I could use some advice on how to replace the wooden gunnels on a Cape Dory 10. I believe they are teak, but are in bad shape having been destroyed by rot and wood boring critters. There is one on the inside of the hull and one on the outside. The issue is that it is a compound curve due to the curvature of the hull plus the shear. I though about laying up thin strips of wood that could be deformed in one plane, but I can't figure out how to bend the wood to match the shear line. Thanks,
gary
Restoring Cape Dory 10: Need wood working advice
-
Prime Time
- Bottom Sanding Grunt
- Posts: 5
- Joined: Wed Oct 22, 2008 12:34 pm
- Location: New Jersey
-
bcooke
- Master of the Arcane
- Posts: 2272
- Joined: Sat Oct 04, 2003 10:55 pm
- Boat Name: Jenny
- Boat Type: 1966 Pearson Triton
- Location: Rowley, MA
- Contact:
If the original is one piece then I would think it was possible to replace 'as per orginal'. On the other hand, I don't have much experience with steaming but I don't think teak steams too well.
From what I know of Cape Dory 10's they have a pretty strong curve in that gunnel and it looks like steaming is the only option.
From what I know of Cape Dory 10's they have a pretty strong curve in that gunnel and it looks like steaming is the only option.
Take a real good look at the existing ones to see how the grain runs, that way you'll be able to tell if they're sawn or bent.
Not familiar with that boat, but depending on width and thickness, you may be surprised at how easily they can be bent into shape.
Once built handrails and cap on a spiral stairway with a 3ft radius, everything was built of 1x oak, handrail was 1x2, cap was 1x2 and 1x3, not realy fun but doable.
Ken.
-
Tim

- Shipwright Extraordinaire
- Posts: 5708
- Joined: Tue Apr 01, 2003 6:39 pm
- Boat Name: Glissando
- Boat Type: Pearson Triton
- Location: Whitefield, ME
- Contact:
I doubt any heroic measures were undertaken to install the rail on that dinghy to begin with. Given that, you might well find that the bends, during installation, aren't nearly as severe as you think. It might be a bit of a challenge to make the bends, but challenging doesn't mean impossible. Wood can be extremely flexible, though you want some pieces of wood without funky grain that might weaken the material.
---------------------------------------------------
Forum Founder--No Longer Participating
Forum Founder--No Longer Participating
-
Ric in Richmond
- Boat Obsession Medal Finalist
- Posts: 518
- Joined: Fri Sep 09, 2005 12:26 am
- Boat Name: Andiamo
- Boat Type: Alberg 35
- Location: Richmond VA
Dyer makes all the parts for their dinghies still.
They have bent would rails and copper rivets too.
Maybe you could look to them for some help and buy some parts there. They were very responsive to my questions about my Dyer 12.5 I bought.
They have bent would rails and copper rivets too.
Maybe you could look to them for some help and buy some parts there. They were very responsive to my questions about my Dyer 12.5 I bought.
Ric Bergstrom
http://andiamoadventures.blogspot.com/
Archived old blog:
http://andiamo35.blogspot.com/
~~~~~([\~~~([\~~([\~~~~~~([\~~([\~~~~~~
~~~~~~([\~~~~~~~([\~~~~~~~~~~~~~~~
http://andiamoadventures.blogspot.com/
Archived old blog:
http://andiamo35.blogspot.com/
~~~~~([\~~~([\~~([\~~~~~~([\~~([\~~~~~~
~~~~~~([\~~~~~~~([\~~~~~~~~~~~~~~~
-
Prime Time
- Bottom Sanding Grunt
- Posts: 5
- Joined: Wed Oct 22, 2008 12:34 pm
- Location: New Jersey
type of wood
Thanks Tim for the response. (We spoke yesterday about a Bristol) I believe the original wood gunnel on the Cape Dory was teak. What wood would be easier to bend? I'm not opposed to building a steam box for the job.
Tim wrote:I doubt any heroic measures were undertaken to install the rail on that dinghy to begin with. Given that, you might well find that the bends, during installation, aren't nearly as severe as you think. It might be a bit of a challenge to make the bends, but challenging doesn't mean impossible. Wood can be extremely flexible, though you want some pieces of wood without funky grain that might weaken the material.
-
Prime Time
- Bottom Sanding Grunt
- Posts: 5
- Joined: Wed Oct 22, 2008 12:34 pm
- Location: New Jersey
picture of dinghy
http://www.capedory.org/specs/brochures/CD10_14.pdf
Here is the original brochure from Cape Dory. It shows how much shear there is.
Here is the original brochure from Cape Dory. It shows how much shear there is.
-
Tim
- Shipwright Extraordinaire
- Posts: 5708
- Joined: Tue Apr 01, 2003 6:39 pm
- Boat Name: Glissando
- Boat Type: Pearson Triton
- Location: Whitefield, ME
- Contact:
The brochure lists the gunwales and seats as being mahogany.
I clipped out the profile of the CD 10 to post here for everyone. It's hard to really tell from a drawing and without seeing the boat, but I don't think the curvature looks insurmountable at all. Certainly it's steam-able, but I bet you could do that dry with either teak or mahogany. Wood is very bendy.

As an aside, can I just say how much I like old brochures? I LOVE this awesome station wagon...nothing dates a photo more quickly than cars!

I clipped out the profile of the CD 10 to post here for everyone. It's hard to really tell from a drawing and without seeing the boat, but I don't think the curvature looks insurmountable at all. Certainly it's steam-able, but I bet you could do that dry with either teak or mahogany. Wood is very bendy.
As an aside, can I just say how much I like old brochures? I LOVE this awesome station wagon...nothing dates a photo more quickly than cars!
---------------------------------------------------
Forum Founder--No Longer Participating
Forum Founder--No Longer Participating

I agree on the old brochures - they're so cool.
I finally found an old brochure that explained the first letters on my Fatty Knees' hull identification number (HMI). I knew it was not made by Edey and Duff but that was all. Turns out there was a Hess Manufacturing, Inc. in Ontario, California
Old cars in movies or brochures are fun - like you say, instant dating. Kind of like photos of people who wear glasses.
R.
-
David VanDenburgh
- Skilled Systems Installer
- Posts: 244
- Joined: Sun Oct 16, 2005 8:33 pm
- Boat Name: Ariel
- Boat Type: Cape Dory 36
- Location: St. Joseph, Michigan
- Contact:
CD 10 Restoration
I've begun a restoration of a CD10. Like yours, my CD's gunwales were shot - mostly gone, really. I'm pretty sure they're mahogany. The seats certainly are.
I'll be eager to hear what you discover during your restoration since I'll be doing the same at some point. Quite frankly, I hadn't even considered the need to steam the wood. I figured I'd be able to get the wood to bend to shape without too much difficulty.
I'd love to see some pictures of your project. I'm converting my CD10 from a rowing dory to a sailing version, and I'm interested in seeing pictures (and getting some dimensions) for the centerboard and trunk.
Link to a bit of the project - scroll down.
David
Agree, they look like it could be pretty easily done
Pick up some cheap 1x2 clear pine and take a practice shot at it, it'll help you to figure out any gotchas before hacking into good wood.
Only other advice I can offer is to pay attention to grain direction, certain cuts (quarter vs flat) bend better in different directions, so matching up the grain with the bends you need, makes it go much smoother.
Ken.
-
David VanDenburgh
- Skilled Systems Installer
- Posts: 244
- Joined: Sun Oct 16, 2005 8:33 pm
- Boat Name: Ariel
- Boat Type: Cape Dory 36
- Location: St. Joseph, Michigan
- Contact:
-
Prime Time
- Bottom Sanding Grunt
- Posts: 5
- Joined: Wed Oct 22, 2008 12:34 pm
- Location: New Jersey
Project Boat
This Dory has been in my family since the early 70's. I grew up sailing her. Thanks for all the advice. I have a web page for my Mirage 27 that I restored, and I'll add this project to it.
-
Tom Javor
- Master Varnisher
- Posts: 100
- Joined: Tue Sep 16, 2008 5:06 pm
- Boat Name: Pandalus
- Boat Type: 1964 Sailmaster 22D hull #3
- Location: Warwick,RI
www.capedory.org
The Cape Dory Owners's Association has a website at www.capedory.org - it has a very active message board and there have been a number of threads about CD10's
TJ
-
Summersdawn
- Skilled Systems Installer
- Posts: 279
- Joined: Fri Nov 04, 2005 6:34 pm
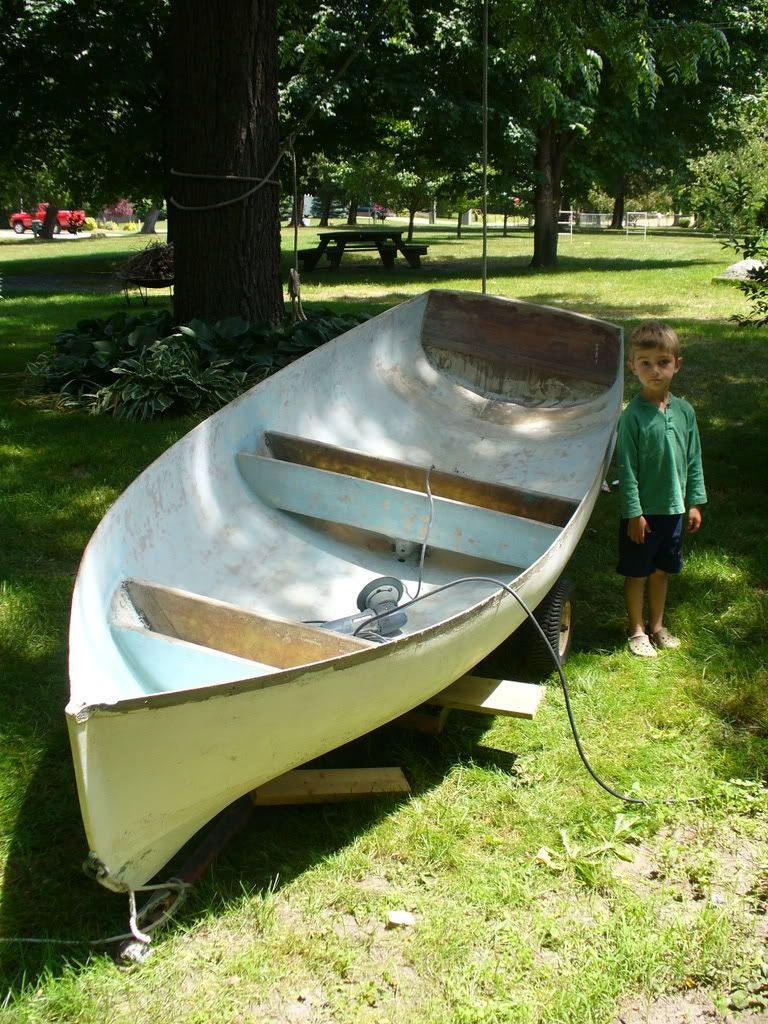
I have a fiberglass shell sitting in my yard that my Dad and I made a number of years ago. We borrowed a mold from some friends that were in the dinghy building business. It needs a little work, some gel peeled off popping it from the mold, and it fell on its side requiring a minor repair. When I find the time, my son and I are going to finish it. It will become his boat.
The dinghy sure looks like the CD10, so I will be following your project with great intrest.
The dinghy sure looks like the CD10, so I will be following your project with great intrest.
Rick
Summer's Dawn
24 San Juan #380
Summer's Dawn
24 San Juan #380
-
Hirilondë
- Master of the Arcane
- Posts: 1317
- Joined: Thu Dec 28, 2006 8:50 am
- Boat Name: Hirilondë
- Boat Type: 1967 Pearson Renegade
- Location: Charlestown, RI
Wow, a lot of threads since I left a week ago for the B and B Mess-about in North Carolina. I wasn't ignoring your PM Gary, just wasn't home.
I have never known gunwales to be steam bent. One of the prime reasons is that the tension of bending them helps make the shape of the hull fair. If the original was one piece mahogany, then it was because it could be simply bent into place as is. Some dinghies use a 2 or 3 layered gunwale bent and laminated under tension in place. This is the case for the dinghies I have built.
For the sake of discussion we need to clarify a little terminology. Gunwale refers to the trim at the top of the sides in general. When it is on the outside of the hull it is also called the outwale. When it is on the inside it is the inwale. In your case both are used to create the gunwale. I would think you could simple bend mahogany to fit the curve. You will likely find that a straight piece will end up following the curve of your hull. You will probably find that the pieces are twisted by the angle of the hull as it changes from bow to stern. This accounts for the curve you perceive.
I suggest you mill some stock to match what was used on your boat. Make the pieces a little too long for starters. Then try dry fitting the outwale to your boat and see what happens. I think you will be surprised how it conforms. Once you reach this point, if needed, take some pictures and post them along with more detailed questions for our continued critique of your project. I think you'll find this easier to do then you might feel it is now.
Dave Finnegan
builder of Spindrift 9N #521 'Wingë'
--------------------------------------------------------------------------------------------------------------------------------------------------------------------
Gresham’s Law of information: Bad information drives out good. No matter how long ago a correction for a particular error may have appeared in print or online, it never seems to catch up with the ever-widening distribution of the error.
-
Quetzalsailor
- Master of the Arcane
- Posts: 1100
- Joined: Fri Aug 26, 2005 9:53 am
- Boat Name: Quetzal
- Boat Type: LeComte North East 38
- Location: Philadelphia, PA
Try the bend cold in knot-free pine, and recognise that Mahogany or Teak will be stiffer and more brittle. You'll want to learn what it takes to solve the problems: whether steaming gunn'l components is necessary - would be for canoe ends - will be for my FD forward rubrails; clamping - there aren't enough hands on your body so perhaps sawn clamps to get things in order are worth making (C-shaped and wedge-shaped pieces of scrap plywood); deforming the hull - maybe you'll need to add temporary thwarts to prevent flatspots; the correct faying shape - if it has to be angled to fit the hull prettily is the inside or outside ovaled to more horizontal then the wood will not want to take the curve w/o also twisting - your clamps can be shaped to control that. Rehearse the whole thing; you won't have time on your side.
It's astonishing how little twist and bend is really achievable in hardwood and how difficult it is to hold it perfectly snug while the epoxy cures. Check out Photobucket/Quetzalsailor/Flying Dutchman and you'll see pics of my bending Mahogany stringers into a jig and then clamping to the hull and my two-shot steam box.
No doubt the manufacturer had steaming and clamping jigs ready as well as patterns made for the four pieces; far easier for him than one-off.
Making a one-off steambox is pretty easy: I used a 2 x 2 for the bottom, two scraps of 3/8" x 4" plywood for the sides and a 3/8" x 2 1/4" scrap for the top. Drywall screwed together with the subject stock loosely blocked in place in the center of the wood tube with loose triangular wood scraps. One end of the plywood was made shorter than the 2" x 2" and additional pieces of the plywood to make up the length were arranged to slide on or off readily. Pot of water on the gas barbeque, aluminum foil to guide the steam into the tube, tube resting on pot and ladder, far end closed with aluminum foil and a meat thermometer. Boil the water and watch the thermometer, continue for the required time after the thermometer reaches steady-state (my stringers were 7/8" x 1", so an hour, according to something I read). Steady state was about 205 f.
The first time I steamed something (the white oak lamina for the stem), I used a piece of cast iron soil pipe for the steambox. The resultant rust stains were not important since the stem was concealed within the finish veneer.
Now, it's the heat, not the steam, that's doing the work of softening the wood. The steam actually is drying the wood as it is serving as the heat transfer medium. Lift the box off the heat. Snatch the HOT wood out of the box and INSTANTLY clamp it into a jig (or the boat). There's a significant amount of springback when the piece is cool, thus a jig with built-in overbend is better than using the boat. Clamp with any metal isolated from your wood since staining is not desirable. Leave the piece in the jig until dry and/or you are ready for final shaping since it will continue to want to spring back.
-
Prime Time
- Bottom Sanding Grunt
- Posts: 5
- Joined: Wed Oct 22, 2008 12:34 pm
- Location: New Jersey
Advice
Thanks all for all the advice. I'll give the progress reports as the project develops.