Guilty as charged. Nathan, Mike, Britton, and me.
Good thing we all had to drive home, or things might have gotten ugly. Or at least loud and obnoxious.
Triton #680 deck work

-
bcooke
- Master of the Arcane
- Posts: 2272
- Joined: Sat Oct 04, 2003 10:55 pm
- Boat Name: Jenny
- Boat Type: 1966 Pearson Triton
- Location: Rowley, MA
- Contact:
The last time I changed my avatar I received a loud howl of protest. I am not sure I want to take that risk again. Besides, there has to be people on the forum today that have no idea how my avatar came into being (hint: go back and search the threads from a couple of years ago) and it gives me a sense of mystery :-)
Joe: Just relocating and upgrading. I find the originals to be a bit too ugly and not quite where I want them. I will probably just shift them a foot or so and replace them with some nice bronze fittings. The whole Pearson drill-a-hole-stick-a-gooped-up-tube-into-the-new-hole method of attaching hoses to the structure doesn't excite me much. I was also thinking I would align the drain with the forward cockpit lid gutter and let the deck drain through the lid gutter. That gives me a clean space on the deck for boarding; a silly feature I know but I obsess over everything...
-Britton
-
Summersdawn
- Skilled Systems Installer
- Posts: 279
- Joined: Fri Nov 04, 2005 6:34 pm
This is the only picture so far that could give your socks a run for the money!bcooke wrote:The last time I changed my avatar I received a loud howl of protest. I am not sure I want to take that risk again. Besides, there has to be people on the forum today that have no idea how my avatar came into being (hint: go back and search the threads from a couple of years ago) and it gives me a sense of mystery :-)
Rick
Summer's Dawn
24 San Juan #380
Summer's Dawn
24 San Juan #380

-
bcooke
- Master of the Arcane
- Posts: 2272
- Joined: Sat Oct 04, 2003 10:55 pm
- Boat Name: Jenny
- Boat Type: 1966 Pearson Triton
- Location: Rowley, MA
- Contact:
I am not sure at this point but I might be taking some time off this week to 'get a life'. If that is the case I won't have time to post an update this week so here is the pre-update:
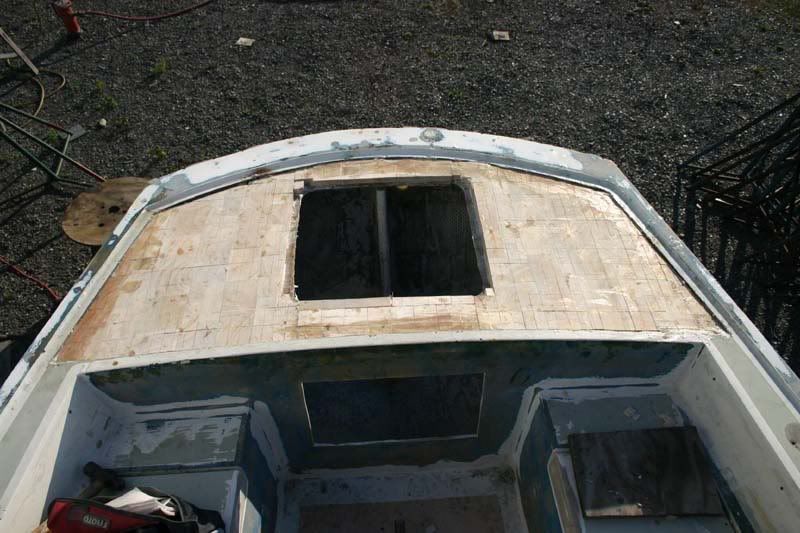
The balsa went in today and tomorrow morning the original top skin will go back down. I also sanded and applied some filler to the patches I made last week and a few more that I never got around to before. Tomorrow, I will probably do some more rough sanding in the cockpit area, maybe make the cut-out in the cabin top for the new water deck fitting, and go over the whole deck with some 'fine' 80 grit before getting serious about starting the "fill and sand" part of the job.
-Britton
-
bcooke
- Master of the Arcane
- Posts: 2272
- Joined: Sat Oct 04, 2003 10:55 pm
- Boat Name: Jenny
- Boat Type: 1966 Pearson Triton
- Location: Rowley, MA
- Contact:
Getting a life might not be part of the contract but it does help with project competion. It might seem to be slowing you down but you come back refreshed, renewed and ready to tighlty grip that grinder for more fun filled days...
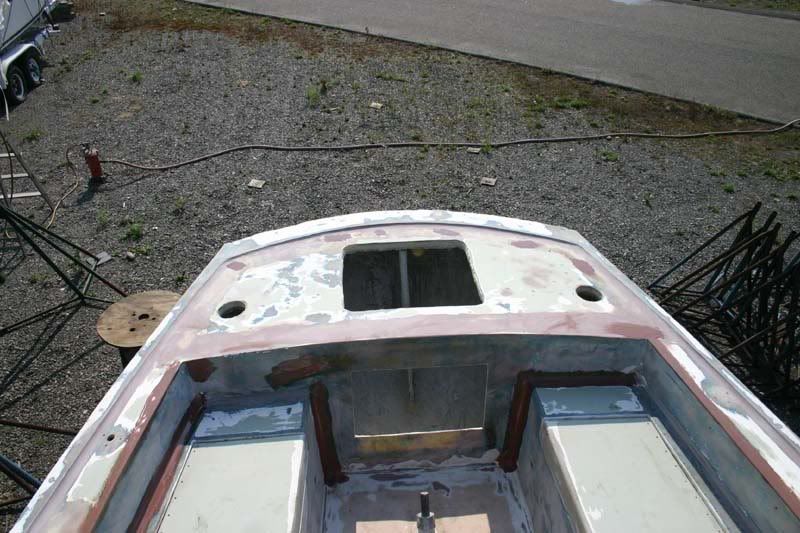
I too liked seeing the shiny new core; especially after digging out the rotten stuff earlier. Now I just sleep better knowing it is gone.
Other than putting the skin back on it doesn't look much different. A few holes have been filled in. A new hole over the chimney was cut out.
I had squeezed thickened epoxy between the cabin side and liner to stop the mystery leaks around the windows. I cleaned up that mess yesterday.
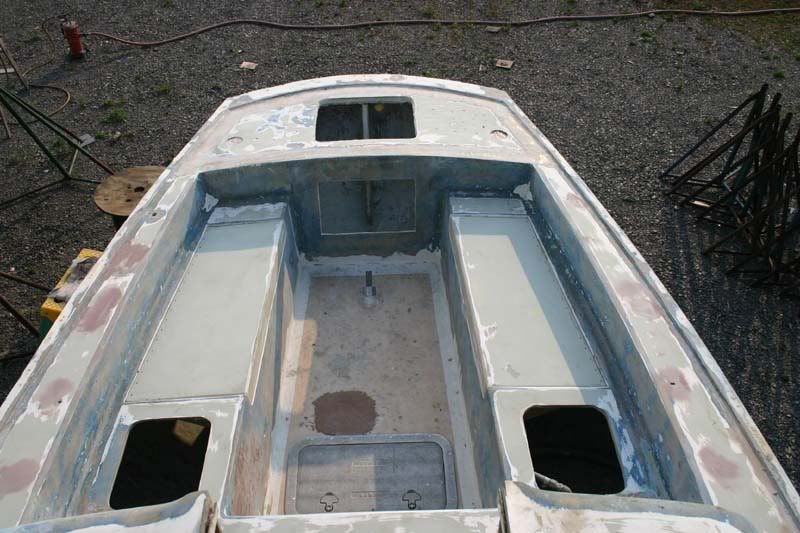
I ordered some deck fittings so I could do the deck cutting before painting. I am still trying to decide how I am going to drain my decks and what fittings I will use. I will use side deck drains, maybe some aft deck drains for that small puddle that forms in the aft corners, and definitely forward cockpit seat drains like Dasein has. Constant puddles in the corners are just too annoying to live with.
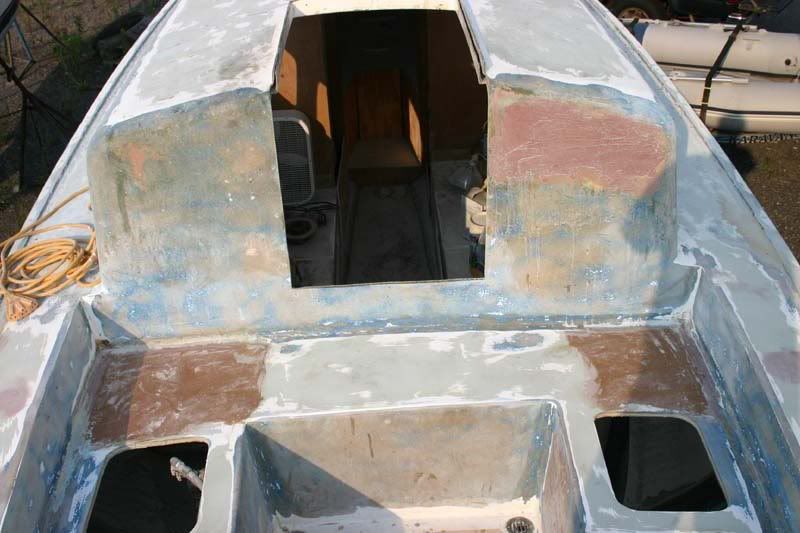
The heavy grinding is basically done. There are just a few spots that I overlooked somehow. I feel like the first phase is done. Next week I get serious about fairing everything. A quick check with a batten suggests that I don't have a serious issue with deck fairness so hopefully a couple of days will do me (yeah right).
Whose idea was it to schedule the deck grinding for the middle of summer heatwave?! I cooked myself yesterday. I also spent too much time curled up into unhealthy postions and my back went on strike today. Today, I managed to get ten minutes worth of work done, some serious vacuuming and snapped a few photos but that was it.
Next week I expect to have photos of my boat covered in red fairing filler.
-Britton
I too liked seeing the shiny new core; especially after digging out the rotten stuff earlier. Now I just sleep better knowing it is gone.
Other than putting the skin back on it doesn't look much different. A few holes have been filled in. A new hole over the chimney was cut out.
I had squeezed thickened epoxy between the cabin side and liner to stop the mystery leaks around the windows. I cleaned up that mess yesterday.
I ordered some deck fittings so I could do the deck cutting before painting. I am still trying to decide how I am going to drain my decks and what fittings I will use. I will use side deck drains, maybe some aft deck drains for that small puddle that forms in the aft corners, and definitely forward cockpit seat drains like Dasein has. Constant puddles in the corners are just too annoying to live with.
The heavy grinding is basically done. There are just a few spots that I overlooked somehow. I feel like the first phase is done. Next week I get serious about fairing everything. A quick check with a batten suggests that I don't have a serious issue with deck fairness so hopefully a couple of days will do me (yeah right).
Whose idea was it to schedule the deck grinding for the middle of summer heatwave?! I cooked myself yesterday. I also spent too much time curled up into unhealthy postions and my back went on strike today. Today, I managed to get ten minutes worth of work done, some serious vacuuming and snapped a few photos but that was it.
Next week I expect to have photos of my boat covered in red fairing filler.
-Britton
-
Tim

- Shipwright Extraordinaire
- Posts: 5708
- Joined: Tue Apr 01, 2003 6:39 pm
- Boat Name: Glissando
- Boat Type: Pearson Triton
- Location: Whitefield, ME
- Contact:
Always it's "next week". Promises, promises!bcooke wrote:Next week...next week...next week
The "getting a life" thing is good, as long as it doesn't cut into the work too much. But vacations are truly good for the work ethic.
Looking good, though. Even though you have a lot of fairing and filling ahead, grinding the epoxy is far better than grinding off the old nonskid and gelcoat: less itch, less-annoying dust, and easier to sand overall. Stick with it.
---------------------------------------------------
Forum Founder--No Longer Participating
Forum Founder--No Longer Participating
-
bcooke
- Master of the Arcane
- Posts: 2272
- Joined: Sat Oct 04, 2003 10:55 pm
- Boat Name: Jenny
- Boat Type: 1966 Pearson Triton
- Location: Rowley, MA
- Contact:
Ummm... I seem to have had a little problem with last weeks photos.
I don't have them.
Use your imagination:
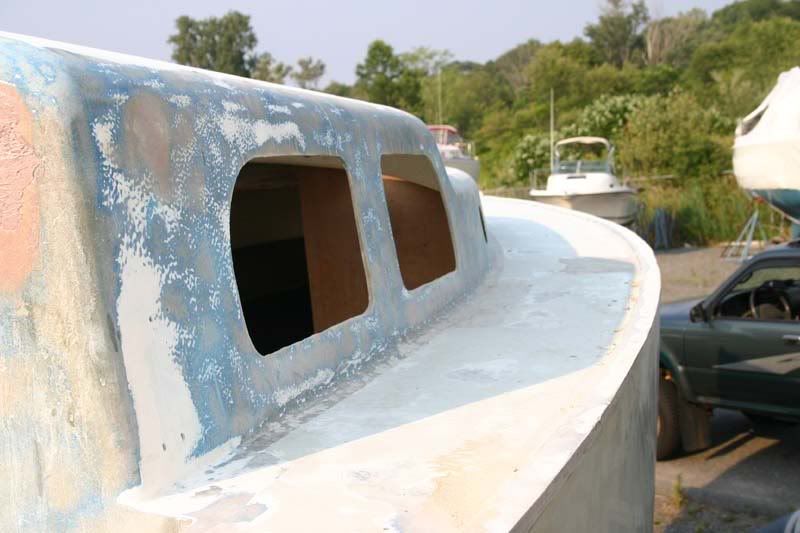
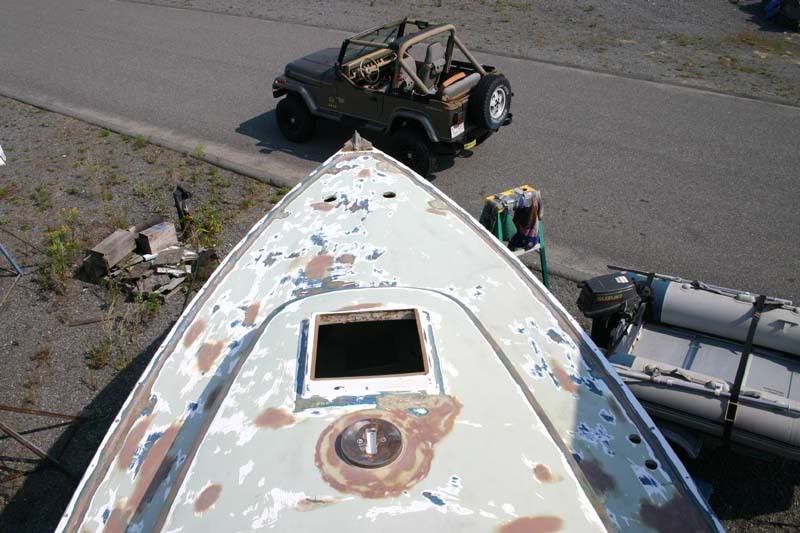
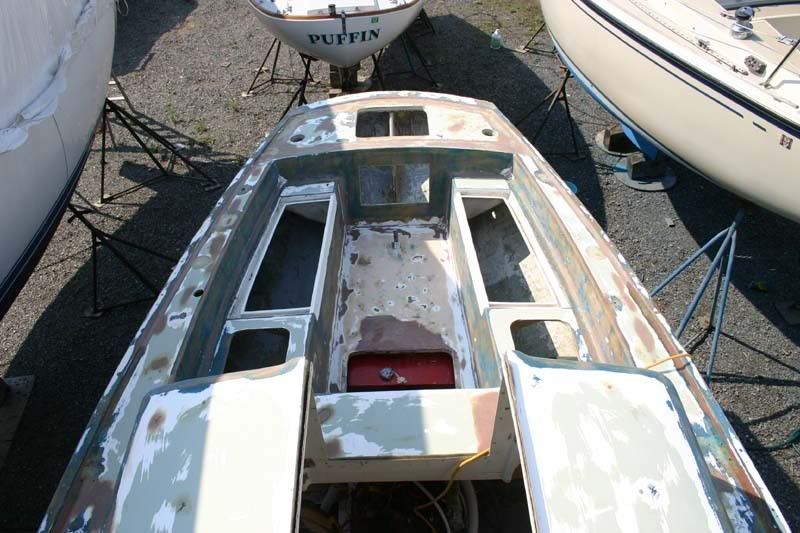
Mixed up lots of epoxy with 407 filler to a fairly thin consistency. Then 'painted' every vertical surface on the boat (cabin and cockpit) leaving it all a smooth red color. That's how it looked last week. Somehow I don't have photos anymore. Too bad as it actually looked like I had done something. Now, after sanding, it looks almost the same.
All the vertical surfaces were absolutely peppered with pinholes up to about 1/8 of an inch in diameter. My solution was to mix up a fairing mixture thin enough to 'paint' a thin coat over everything. It seemed to work. After sanding it I found that it took care of around 95% of the pinholes. The rest I will take care of with my final fairing filler.
Another trick that seemed to work out for me:
Grinding the gelcoat out of the corners was pretty tricky and terribly time consuming with the DA sander. Therefore, I attacked it with my grinder and an angled flap wheel. By going lightly I could minimize the gouging and it made quick work of the heavily crazed gelcoat in the corners. Then, I used my 'painting' trick again and painted all the corners with the thickened epoxy. Thickened epoxy is easy to sand, even in the corners, with the DA sander so I was able to make quick work of it.
Apply fairing mixture, sand it off, apply fairing mixture, sand it off... That's about it. At some point I will call it 'good enough' but I am not there yet. The heavy stuff is done. Now it is getting down to particulars. I will be taking a sanding board and some spray paint out with me the next time and really see how fair the decks are.
And finally, just to remind myself that better things are coming
-Britton
I don't have them.
Use your imagination:
Mixed up lots of epoxy with 407 filler to a fairly thin consistency. Then 'painted' every vertical surface on the boat (cabin and cockpit) leaving it all a smooth red color. That's how it looked last week. Somehow I don't have photos anymore. Too bad as it actually looked like I had done something. Now, after sanding, it looks almost the same.
All the vertical surfaces were absolutely peppered with pinholes up to about 1/8 of an inch in diameter. My solution was to mix up a fairing mixture thin enough to 'paint' a thin coat over everything. It seemed to work. After sanding it I found that it took care of around 95% of the pinholes. The rest I will take care of with my final fairing filler.
Another trick that seemed to work out for me:
Grinding the gelcoat out of the corners was pretty tricky and terribly time consuming with the DA sander. Therefore, I attacked it with my grinder and an angled flap wheel. By going lightly I could minimize the gouging and it made quick work of the heavily crazed gelcoat in the corners. Then, I used my 'painting' trick again and painted all the corners with the thickened epoxy. Thickened epoxy is easy to sand, even in the corners, with the DA sander so I was able to make quick work of it.
Apply fairing mixture, sand it off, apply fairing mixture, sand it off... That's about it. At some point I will call it 'good enough' but I am not there yet. The heavy stuff is done. Now it is getting down to particulars. I will be taking a sanding board and some spray paint out with me the next time and really see how fair the decks are.
And finally, just to remind myself that better things are coming
-Britton
-
dasein668
- Boateg
- Posts: 1637
- Joined: Thu Apr 03, 2003 9:09 am
- Boat Name: Dasein
- Boat Type: Pearson Triton 668
- Location: Portland, Maine
- Contact:
Use your imagination: the boat in this photo is outdoors and has a light green hull....bcooke wrote:Use your imagination:
Mixed up lots of epoxy with 407 filler to a fairly thin consistency. Then 'painted' every vertical surface on the boat (cabin and cockpit) leaving it all a smooth red color.

Nathan
dasein668.com
dasein668.com
-
bcooke
- Master of the Arcane
- Posts: 2272
- Joined: Sat Oct 04, 2003 10:55 pm
- Boat Name: Jenny
- Boat Type: 1966 Pearson Triton
- Location: Rowley, MA
- Contact:
This week started off well.
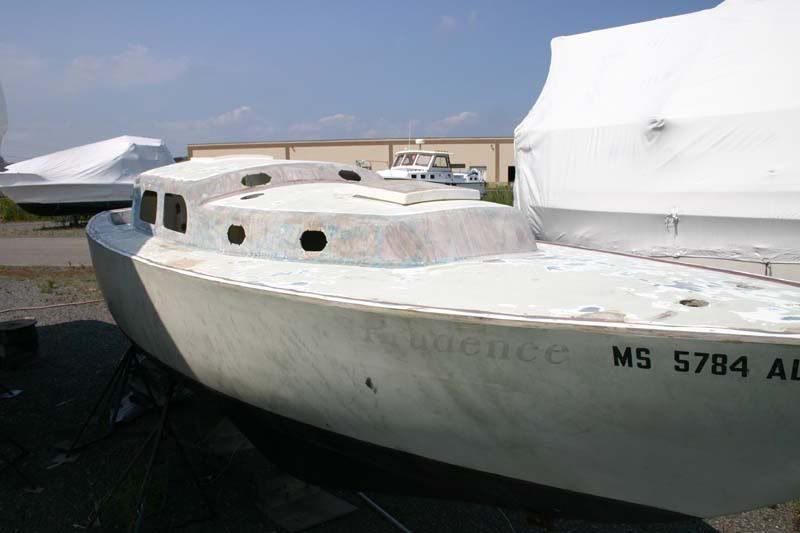
I sprayed a mist of paint over the entire boat and then longboarded the whole thing to find the depressions. First, longboarding is a killer. Second, I was lucky to find that I won't need to fill a thousand depressions. I found a couple of spots but not too bad overall.
And then the week went all to pieces. My truck, aka my boat shop, has been suggesting that it might be time to do something with the transmission. Being an old 240k rust bucket I was hoping to drive it a bit longer and then pawn it off on one of these people that ship them overseas. Unfortunately, this week the occasionally annoying transmission decided to bite it and I have been left scrambling for alternative transportation (yeah, Mike, I saw your post but I really want an open pickup bed).
[edit] long rant on the demise of cheap, economical, and conveniently sized small pickups [/edit]
So this week's plans got smashed. I only mention it as notice to those that come after. While I had the best of intentions of getting 3-4 full days of work done on the boat all this summer I find 1-2 days has been more like my average. I keep moving forward so I guess that is good.
Now, anyone have a 2.75 inch forstner drill bit they want to sell/loan? I need to make two shallow cuts for my new cockpit drains and I really don't want to buy a $30-40 drill bit that will cut maybe 0.5 inches of material in my current lifetime.
You know, maybe The Plastic Classic Forum should start a library for odd tools that are rarely used. Someone would just have to keep track of where the tools are and when someone else needs them have the current holder simply mail them along. As it is we are all accumulating tools that will never be used twice before our heirs pitch it out with every other bit of useless crap that comes with boats and boating. (personally, my random bits of boat stuff pile is getting pretty tall).
Just a thought.
-Britton
-
dasein668
- Boateg
- Posts: 1637
- Joined: Thu Apr 03, 2003 9:09 am
- Boat Name: Dasein
- Boat Type: Pearson Triton 668
- Location: Portland, Maine
- Contact:
The forstner bit that I bought for that purpose was still at Tim's this fall. I don't recall if it was 2.75, but it was in that neighborhood.bcooke wrote:Now, anyone have a 2.75 inch forstner drill bit they want to sell/loan? I need to make two shallow cuts for my new cockpit drains and I really don't want to buy a $30-40 drill bit that will cut maybe 0.5 inches of material in my current lifetime.
I wish I could remember where I got it because I'd swear to Heaven Above that I paid like 7.84 for it.
If Tim can find it and wants to send it to you, or you want to pick it up, that's all good. I would like for it to come back to someplace that I can get my hands on it when you're finished, though.
Nathan
dasein668.com
dasein668.com
-
Tim
- Shipwright Extraordinaire
- Posts: 5708
- Joined: Tue Apr 01, 2003 6:39 pm
- Boat Name: Glissando
- Boat Type: Pearson Triton
- Location: Whitefield, ME
- Contact:
It's 2-5/8", and it's here at the shop. If this size works for you, Britton, let me know if you want me to send it, or if you want to otherwise borrow it. Of course I need it back for the Odd Tool Library Collection. I know where you live, so be nice to my (taking vicarious ownership on Nathan's behalf) tools.dasein668 wrote:The Forstner bit that I bought for that purpose was still at Tim's this fall. I don't recall if it was 2.75, but it was in that neighborhood.bcooke wrote:Now, anyone have a 2.75 inch forstner drill bit they want to sell/loan? I need to make two shallow cuts for my new cockpit drains and I really don't want to buy a $30-40 drill bit that will cut maybe 0.5 inches of material in my current lifetime.
I wish I could remember where I got it because I'd swear to Heaven Above that I paid like 7.84 for it.
If Tim can find it and wants to send it to you, or you want to pick it up, that's all good. I would like for it to come back to someplace that I can get my hands on it when you're finished, though.
(Actually, I don't really know exactly where you live, but I know where your boat is...)
I think this collection is already underway here. I won't usually hesitate (at least not for long) to buy an odd tool if I need it to get through one thing or another, even if only once. If I can't think of another way, using existing tools, to satisfactorily accomplish the task at hand, I'll sigh deeply and buy the one-use bit or whatever. So I have a few oddball things.bcooke wrote:You know, maybe The Plastic Classic Forum should start a library for odd tools that are rarely used. Someone would just have to keep track of where the tools are and when someone else needs them have the current holder simply mail them along. As it is we are all accumulating tools that will never be used twice before our heirs pitch it out with every other bit of useless crap that comes with boats and boating. (personally, my random bits of boat stuff pile is getting pretty tall).
There's really no such thing as a "one use only" tool, though. It seems that once you have something, however odd it may be, you find additional uses for it down the road.
---------------------------------------------------
Forum Founder--No Longer Participating
Forum Founder--No Longer Participating
-
bcooke
- Master of the Arcane
- Posts: 2272
- Joined: Sat Oct 04, 2003 10:55 pm
- Boat Name: Jenny
- Boat Type: 1966 Pearson Triton
- Location: Rowley, MA
- Contact:
A short and depressing update:
My Real Life woes spilled over into this week and crushed my boat plans. Next week is looking slightly better and after that my schedule frees up considerably (everything that could go wrong has gone wrong and been fixed (or is being sold off) already)
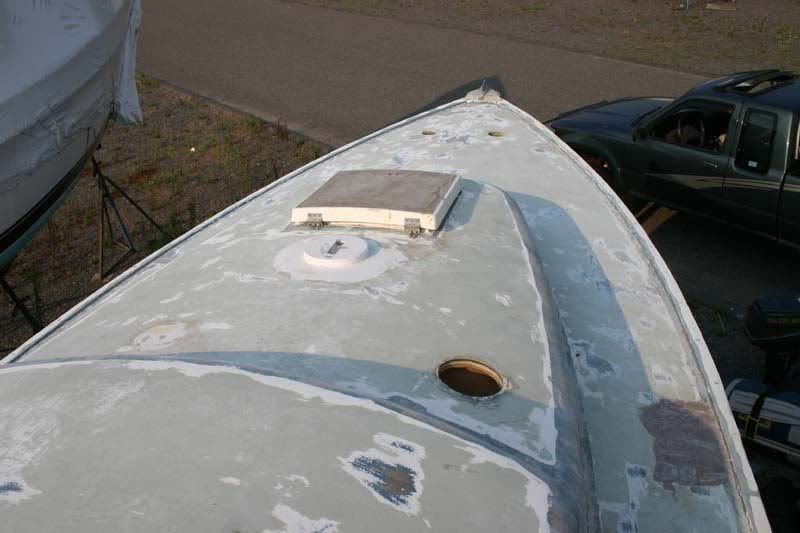
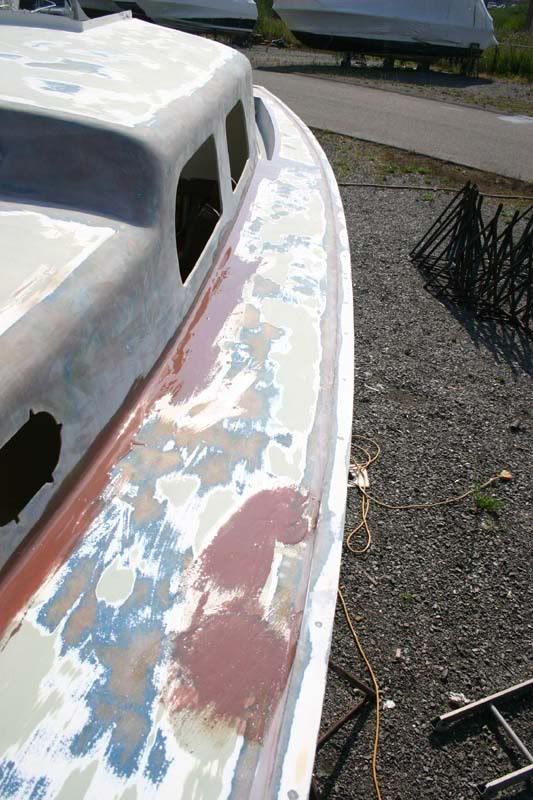
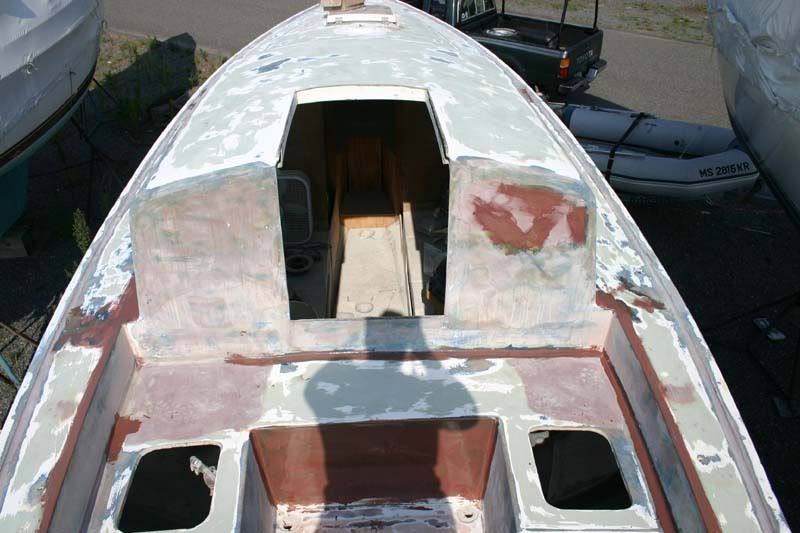
A little bit of wax on/wax off again this week. After a thorough cleaning and vacuuming, I ran my hands over the entire deck surface and marked any spots that felt low or otherwise needed improvement. Then I applied more filler. I think I am at the point where further fairing will become silly. Maybe it is just my boat but looking down the decks in a critical light shows the whole deck to be a bit wavy. Not the wavy that would be caused by sanding but a larger pattern of unevenness. You have to look pretty hard to see it and I never noticed it before I became so intimate with my deck so I think I am going to say 'good enough' after my next round of long boarding. Some Awl-Fair final fairing putty for the pinholes and it will be time to order up the primer.
Question of laziness: Can I just lay down high build primer or do I need to use a normal primer and then a high build primer ove that? (I could look it up but it is easier if someone here does it for me :-)
My Real Life woes spilled over into this week and crushed my boat plans. Next week is looking slightly better and after that my schedule frees up considerably (everything that could go wrong has gone wrong and been fixed (or is being sold off) already)
A little bit of wax on/wax off again this week. After a thorough cleaning and vacuuming, I ran my hands over the entire deck surface and marked any spots that felt low or otherwise needed improvement. Then I applied more filler. I think I am at the point where further fairing will become silly. Maybe it is just my boat but looking down the decks in a critical light shows the whole deck to be a bit wavy. Not the wavy that would be caused by sanding but a larger pattern of unevenness. You have to look pretty hard to see it and I never noticed it before I became so intimate with my deck so I think I am going to say 'good enough' after my next round of long boarding. Some Awl-Fair final fairing putty for the pinholes and it will be time to order up the primer.
Question of laziness: Can I just lay down high build primer or do I need to use a normal primer and then a high build primer ove that? (I could look it up but it is easier if someone here does it for me :-)
You obviously didn't run in haste to Home Despot. That is where I came up with that price. I like your price better. Too bad you are holding out on me...I wish I could remember where I got it because I'd swear to Heaven Above that I paid like 7.84 for it.
-
Tim
- Shipwright Extraordinaire
- Posts: 5708
- Joined: Tue Apr 01, 2003 6:39 pm
- Boat Name: Glissando
- Boat Type: Pearson Triton
- Location: Whitefield, ME
- Contact:
The tooling for these old boats was rarely perfect, or even close to perfect; the hulls and decks weren't perfectly fair and wave-free straight from the factory.
Of course this can all be smoothed and faired exhaustively, but really, attempting to eliminate all unevenness, when it exists in the basic mold of the boat, is a difficult task. At some point, you have to call "good enough" good enough. There's just only so far that you can realistically take it.
Two words that should guide any individual through any part of any project: "Achievable Perfection". This mantra is self-conforming to any person's skill set and overall expectations for whatever aspect of the project. (This ties in closely with Dirty Harry's observation: "A man's got to know his limitations".)
The high build will help you locate any serious areas of unfairness that may be highlighted by the glossy topcoats. If you've done a good job fairing, there won't be any major areas that you have to fix after the high build--just pinholes.
Finally, remember that the nonskid areas are very forgiving of that minor wavyness.
It's high build over your raw deck and hull, then minor spot fairing (pinholes) as required, then finish primer, then topcoats.
Obviously you missed where I offered you the loan of this very bit, a couple posts up.bcooke wrote:You obviously didn't run in haste to Home Despot. That is where I came up with that price. I like your price better. Too bad you are holding out on me...I wish I could remember where I got it because I'd swear to Heaven Above that I paid like 7.84 for it.
---------------------------------------------------
Forum Founder--No Longer Participating
Forum Founder--No Longer Participating
-
bcooke
- Master of the Arcane
- Posts: 2272
- Joined: Sat Oct 04, 2003 10:55 pm
- Boat Name: Jenny
- Boat Type: 1966 Pearson Triton
- Location: Rowley, MA
- Contact:
Oh, I read the post. I just couldn't pass up an opportunity to take a dig at Nathan :-) I will probably be stopping by soon to 'borrow' that bit and anything else you don't have bolted down...
Ah, so I shouldn't get too worried about pinholes until after the high build primer. That should save some time.
Achieveable Perfection is a good thing.
-Britton
Ah, so I shouldn't get too worried about pinholes until after the high build primer. That should save some time.
Achieveable Perfection is a good thing.
-Britton
-
bcooke
- Master of the Arcane
- Posts: 2272
- Joined: Sat Oct 04, 2003 10:55 pm
- Boat Name: Jenny
- Boat Type: 1966 Pearson Triton
- Location: Rowley, MA
- Contact:
I guess I need to order some primer supplies.
Do I understand correctly that Awl Grip Ultra High Build Primer is brush-able? The I thought the instructions said otherwise so I want to check.
I remember people recomending against Awl-Quick if possible but I think it is the correct material for brushing/rolling according to Awl-Grip Inc.
The instructions also mention using 545 before the high build 'for best results'. Anyone ever tried this and was it worth it?
And who has the best prices?...
-Britton
-
Tim
- Shipwright Extraordinaire
- Posts: 5708
- Joined: Tue Apr 01, 2003 6:39 pm
- Boat Name: Glissando
- Boat Type: Pearson Triton
- Location: Whitefield, ME
- Contact:
Actually, the pinhole process usually takes two steps.
First, fill any obvious pinholes in your bulk epoxy fairing before you apply any primer. But priming usually highlights additional pinholes that you'll have to fill at that time.
The problem that you'll have with brushing just about any high-build primer is that they are heavy enough that they don't tend to self-level well at all, regardless of the amount of reducer you add. When I used Awl-Quik, I achieved more even and better results with just a roller and no attempt at tipping off with a brush; the brush marks would never level properly, and sanding the primer smooth to eliminate the brush marks burned through the primer in multiple and widespread areas. The problem was so bad after my initial 3 coats that I had to reapply several more coats (this time with only a fine mohair roller and no brush).
You can use this primer successfully as long as you know what to expect in advance, and take the proper application precautions.
I think when applying these primers with roller and brush it's best to plan on a couple extra coats to ensure plenty of sandable thickness.
I've applied neither Awl-Grip Ultra High Build nor 545 with roller and brush, so I have no advice regarding brushing these products.
---------------------------------------------------
Forum Founder--No Longer Participating
Forum Founder--No Longer Participating
-
Figment
- Damned Because It's All Connected
- Posts: 2846
- Joined: Tue Apr 08, 2003 9:32 am
- Boat Name: Triton
- Boat Type: Grand Banks 42
- Location: L.I. Sound
Absolutely plan on at least one extra coat, but that's not such a big deal. It goes on very easily and as I recall it has a pretty quick recoat time. 4 coats/day perhaps?
That last coat is simply to fill the "valleys" of the previous coat's brushstrokes. You're going to sand that, and most of the previous coat, off just to get to a uniform surface, but it's delightful sanding.
That last coat is simply to fill the "valleys" of the previous coat's brushstrokes. You're going to sand that, and most of the previous coat, off just to get to a uniform surface, but it's delightful sanding.
-
bcooke
- Master of the Arcane
- Posts: 2272
- Joined: Sat Oct 04, 2003 10:55 pm
- Boat Name: Jenny
- Boat Type: 1966 Pearson Triton
- Location: Rowley, MA
- Contact:
Trivia.
McMaster and Carr only sells Forstner drill bits up to 2.125" in diameter (I was looking for 2.75". The selling price of this bit is $54.00.
$7.84 indeed.....
I bought a hole saw. I will just have to make the cut and then chip out the inside material. It really doesn't need to be that pretty. Thickened epoxy and a little sealant will clean it up nice.
-Britton
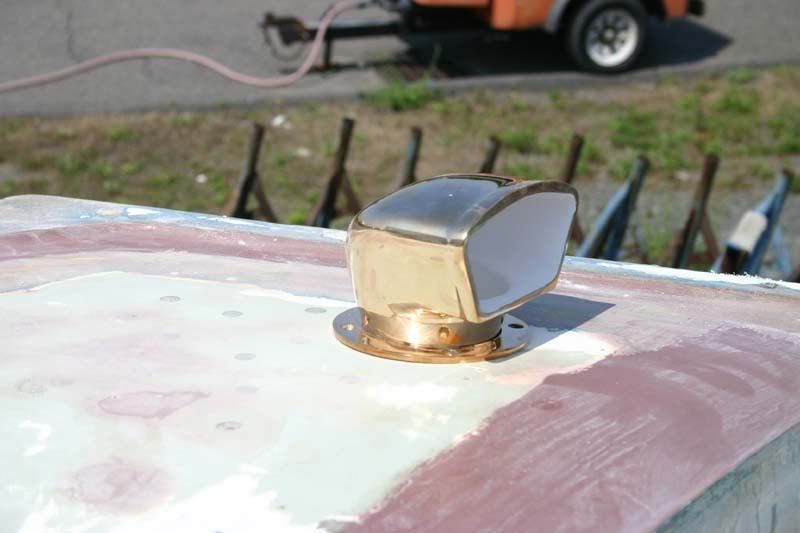
Okay, someone is going to ask why the big drill. I have a couple of Marelon flush mount deck drains/thru-hulls that I want to recess into my cockpit for draining purposes. I want a removable fitting so I can lift it out and then replace the short straight section of hose between the fitting and the seacock under the cockpit. I originally installed the seacock with the hose at the same time and replacing just the hose is going to be pretty difficult with the normal Triton glassed in tubes.
I will get you all a picture...
-Britton
McMaster and Carr only sells Forstner drill bits up to 2.125" in diameter (I was looking for 2.75". The selling price of this bit is $54.00.
$7.84 indeed.....
I bought a hole saw. I will just have to make the cut and then chip out the inside material. It really doesn't need to be that pretty. Thickened epoxy and a little sealant will clean it up nice.
-Britton
Okay, someone is going to ask why the big drill. I have a couple of Marelon flush mount deck drains/thru-hulls that I want to recess into my cockpit for draining purposes. I want a removable fitting so I can lift it out and then replace the short straight section of hose between the fitting and the seacock under the cockpit. I originally installed the seacock with the hose at the same time and replacing just the hose is going to be pretty difficult with the normal Triton glassed in tubes.
I will get you all a picture...
-Britton
-
Tim
- Shipwright Extraordinaire
- Posts: 5708
- Joined: Tue Apr 01, 2003 6:39 pm
- Boat Name: Glissando
- Boat Type: Pearson Triton
- Location: Whitefield, ME
- Contact:
The mystery vendor for the inexpensive large Forstner bits is Woodcraft.
The 2-3/4" bit is item # 125949 and sells for $17.99. (Nathan's 2-5/8" version cost $15.99.)
Link: Woodcraft Forstner Bit (Individual bits located far down on this page)
The 2-3/4" bit is item # 125949 and sells for $17.99. (Nathan's 2-5/8" version cost $15.99.)
Link: Woodcraft Forstner Bit (Individual bits located far down on this page)
---------------------------------------------------
Forum Founder--No Longer Participating
Forum Founder--No Longer Participating
-
Figment
- Damned Because It's All Connected
- Posts: 2846
- Joined: Tue Apr 08, 2003 9:32 am
- Boat Name: Triton
- Boat Type: Grand Banks 42
- Location: L.I. Sound
I think 4 mixed gallons will be more than adequate. I assume you're not going to fuss much over the nonskid acreage.
I think it was the Alexseal "super-build 302". Quite pudding-like. "high-build" and "super high-build" are Alwgrip? I don't know how they relate.
The Alexseal super-build builds to 20 mil thickness in three coats. Does Awlgrip publish corresponding film thickness info?
I think it was the Alexseal "super-build 302". Quite pudding-like. "high-build" and "super high-build" are Alwgrip? I don't know how they relate.
The Alexseal super-build builds to 20 mil thickness in three coats. Does Awlgrip publish corresponding film thickness info?
-
bcooke
- Master of the Arcane
- Posts: 2272
- Joined: Sat Oct 04, 2003 10:55 pm
- Boat Name: Jenny
- Boat Type: 1966 Pearson Triton
- Location: Rowley, MA
- Contact:
Oh. I guess I was under the impression you were working with Awl-grip products. According to the application guide:
Awl-Quick 2-3 mils per application.
High Build 5-7 mils per.
Ultra-High Build 15-20 mils per.
Sounds like you were using something comparable to High Build.
Thanks. Any other tips from anyone before I commit to this next step?
-Britton
Awl-Quick 2-3 mils per application.
High Build 5-7 mils per.
Ultra-High Build 15-20 mils per.
Sounds like you were using something comparable to High Build.
Thanks. Any other tips from anyone before I commit to this next step?
-Britton
-
Figment
- Damned Because It's All Connected
- Posts: 2846
- Joined: Tue Apr 08, 2003 9:32 am
- Boat Name: Triton
- Boat Type: Grand Banks 42
- Location: L.I. Sound
Read the fine print. Those are thicknesses per application? How many coats do they consider one "application"?
anything that goes on 20 mils thick in one coat is going to be like vaseline-consistency. I suspect that the 15-20 mils is a multicoat application.
I suspect that I was using something comparable to the ultra-high. 5-7 mils isn't very thick at all. The topcoat is going to be 3 mil, right?
anything that goes on 20 mils thick in one coat is going to be like vaseline-consistency. I suspect that the 15-20 mils is a multicoat application.
I suspect that I was using something comparable to the ultra-high. 5-7 mils isn't very thick at all. The topcoat is going to be 3 mil, right?
-
Hirilondë
- Master of the Arcane
- Posts: 1317
- Joined: Thu Dec 28, 2006 8:50 am
- Boat Name: Hirilondë
- Boat Type: 1967 Pearson Renegade
- Location: Charlestown, RI
I primed my Renegade by hand with 5 coats of 545, two coats mixed with AwlGrip's high build. I found that the roller alone left a better coat as well. I only used a brush where the roller wouldn't go (inside corners).Tim wrote:I've applied neither Awl-Grip Ultra High Build nor 545 with roller and brush, so I have no advice regarding brushing these products.
Dave Finnegan
builder of Spindrift 9N #521 'Wingë'
--------------------------------------------------------------------------------------------------------------------------------------------------------------------
Gresham’s Law of information: Bad information drives out good. No matter how long ago a correction for a particular error may have appeared in print or online, it never seems to catch up with the ever-widening distribution of the error.
-
Tim
- Shipwright Extraordinaire
- Posts: 5708
- Joined: Tue Apr 01, 2003 6:39 pm
- Boat Name: Glissando
- Boat Type: Pearson Triton
- Location: Whitefield, ME
- Contact:
Yes. Just do it!bcooke wrote:Any other tips from anyone before I commit to this next step?
You'll find your own way through the process as you go. Every person's technique, application materials, and product mixing ability is different and beyond what's already been said, you're going to find a number of differences as you go anyway.
So get priming! It's only primer and you'll quickly learn the ins and outs of the product.
---------------------------------------------------
Forum Founder--No Longer Participating
Forum Founder--No Longer Participating
-
Tim
- Shipwright Extraordinaire
- Posts: 5708
- Joined: Tue Apr 01, 2003 6:39 pm
- Boat Name: Glissando
- Boat Type: Pearson Triton
- Location: Whitefield, ME
- Contact:
The Awlgrip Ultra build calls for 15-20 mils total dry film thickness . This is not a per-coat thickness, but the recommended total thickness. Your numbers above are trying to compare total thickness for one product with per coat thickness for another.
Awlgrip high build indicates 4-5 mils dry film thickness per coat, with 2-3 coats recommended (for around 15mils total DFT).
Link: Data Sheet for Awlgrip High Build Primer
Link: Data Sheet for Awlgrip Ultra Build Primer
For further reference and comparison with your Awlgrip choices, the Alexseal 302 Super Build primer indicates 6-12 mils wet film thickness per coat, as detailed below. This is about 4-6 mils DFT per coat.
Link: Data sheet for Alexseal 302 Super Build Primer
Note the differences between wet film thickness (WFT) and dry film thickness (DFT). Note also that rolling may provide different thicknesses than these numbers, which are for spray application.
You know, these data sheets are readily available on the web and you could have answered all your own questions. I really shouldn't enable your laziness by doing your research for you! Lucky for you that I'm a nice guy (all appearances to the contrary...)
In the end these are just numbers and mumbo-jumbo, and it's senseless to worry too much about how much is supposed to be going on; you're not going to measure it anyway. Just put the stuff on; the thickness of the coat is pretty much self-metering by the properties of the product and the application method anyway. If your high build seems to be smooth and sandable after rolling, then do 3 coats; otherwise do 4 or more as you see fit, or until you run out of product, whichever comes first. You don't really want more on there than you need either.
---------------------------------------------------
Forum Founder--No Longer Participating
Forum Founder--No Longer Participating
-
bcooke
- Master of the Arcane
- Posts: 2272
- Joined: Sat Oct 04, 2003 10:55 pm
- Boat Name: Jenny
- Boat Type: 1966 Pearson Triton
- Location: Rowley, MA
- Contact:
I knew you were going to say that. Easy words for someone that has painted dozens of boats. Not so easy for someone that has never painted anything let alone the love-of-his-life... :-)bcooke wrote:
Any other tips from anyone before I commit to this next step?
Yes. Just do it!
Thanks Dave.
And thanks Mike for pointing out the little difference between total and per application buildup. I didn't catch that and the whole 'mils' thing kinda goes over my head anyway.
so $450 worth of primers and I should be about there.
One last question. Do I need the manufacturer's brand of dewax/cleaning solvent or is it just a re-packaged chemical I can pick up at any hardware store (acetone/MEK/whatever)?
Now I just have to figure out how to scrub down my decks without soaking my interior through all the open holes...
-Britton
-
Tim
- Shipwright Extraordinaire
- Posts: 5708
- Joined: Tue Apr 01, 2003 6:39 pm
- Boat Name: Glissando
- Boat Type: Pearson Triton
- Location: Whitefield, ME
- Contact:
Some common products will affect the painted surface if you use them to clean between coats or between stages of application. This is one good reason to stick with the product supplied by the specific paint manufacturer, since you know it to be safe for that specific use.bcooke wrote:Do I need the manufacturer's brand of dewax/cleaning solvent or is it just a re-packaged chemical I can pick up at any hardware store (acetone/MEK/whatever)?
The name-brand cleaners like Awl-Prep and such may be only glorified versions of common solvents, but they're part of the overall system, tend to be more pure (that is, less likely to contaminate the surface on their own), and make the most sense to use if only to ensure compatibility--well worth the few extra dollars it might cost.
Plus, if something goes horribly wrong with your coating and you look to the manufacturer for assistance, it'd be best to be able to show that you used their product line throughout the process.
It just doesn't make sense to choose a premium coating and then look for ways around using the entire system as designed, in my opinion. Lack of following directions and using incompatible products are the root causes for most painting disasters.
---------------------------------------------------
Forum Founder--No Longer Participating
Forum Founder--No Longer Participating


-
bcooke
- Master of the Arcane
- Posts: 2272
- Joined: Sat Oct 04, 2003 10:55 pm
- Boat Name: Jenny
- Boat Type: 1966 Pearson Triton
- Location: Rowley, MA
- Contact:
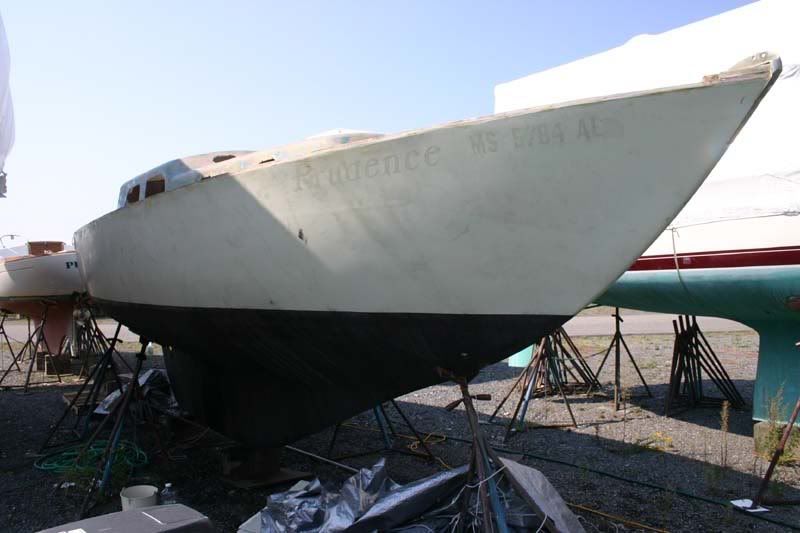
Rest assured, the black bottom paint will be over-coated next spring with green bottom paint. I will be lowering it down to the lower scribed water line. I painted to the top scribed line last time but that proved totally unnecessary.
I could take all the bottom paint off but that is only one season's worth of paint on there and I am not in any hurry to revisit that little project when I have so many more pressing things to do before next spring's launch.
Ummm... yeah, I was going to. Any reason why I shouldn't? I reinstalled it a few years ago with the idea of it being removable but I can't see any reason to pull it up now.
-Britton
I could take all the bottom paint off but that is only one season's worth of paint on there and I am not in any hurry to revisit that little project when I have so many more pressing things to do before next spring's launch.
Mike wrote:Planning on painting the mast step in place?
Ummm... yeah, I was going to. Any reason why I shouldn't? I reinstalled it a few years ago with the idea of it being removable but I can't see any reason to pull it up now.
-Britton
-
Tim Mertinooke
- Skilled Systems Installer
- Posts: 200
- Joined: Wed Jan 11, 2006 12:50 am
- Location: Massachusetts
- Contact: