Page 5 of 5
Re: Ericson 27 Project
Posted: Thu Jun 30, 2011 9:04 am
by JoeC
Another thought came to mind on the spreader reinforcing area.
I can not see any attachment of the thru bar(which the spreaders attach to) to the mast itself.
If it is just a slip fit in the slot, it can slide back and forth thru the mast which is not how the original spreader setup was designed to work. Each spreader acts as a compression strut and must bear against the mast to work.
Your thru bar setup is ok if you have prevented it from sliding back and forth through the mast under load.
Again, a very impressive project.
Best of luck
Joe
Re: Ericson 27 Project
Posted: Fri Jul 01, 2011 1:00 am
by bigd14
Hi JoeC- Not cold water, I welcome all thoughts and opinions!
For the mast repair job, I spent months researching repair methods and sought the advice of two professionals as well as other non-professionals who had done similar work. Buzz Ballenger of Ballenger Spars in CA made the repair plates and recommended the spreader bar arrangement (and constructed it and the spreaders). He was familiar with the mast profile and had worked with the same profile before. He originally advised I use Monel rivets and 5200. I also had Brion Toss, a Master Rigger from Washington down to inspect the rig prior to installing the plates and spreader bar. He also approved of the arrangement and recommended that instead of rivets I use the #10 screws. I asked if I should use 1/4 inch screws and he said it was not necessary. So overall I feel pretty comfortable with the set up. At any rate, its not going to come off, what with the 5200 in place!
Oh, and the spreaders bolt through the spreader bar so they cannot compress the mast. Two 1/4 screws per spreader tapped into both the spreader and spreader bar for a tight fit and secured with a lock nut. And the spreaders are scribed to fit tight against the mast to spread any small compression loads that might be present onto a large area of the mast/repair plate.
Doug
Re: Ericson 27 Project
Posted: Fri Jul 01, 2011 9:27 am
by JoeC
Sounds like you did alot of research on this fix before proceeding which is always a prudent way to go.
Getting advice from professionals that have past experience in similar problems should give you a level of confidence in the integrity of the fix.
What prompted all of this was what seemed to be a mismatch between the size of the reinforcing plates and what one would normally expect in a corresponding size of screws. My original comments were not based on any design load calculations but just arose from eyeballing it .......
Time has arrived for you to enjoy the fruits of your labor, well deserved, I may add.
Best of luck
joe
Re: Ericson 27 Project
Posted: Fri Jul 01, 2011 10:18 am
by bigd14
Well, I do appreciate people voicing potential concerns about any aspect of this project. Having this much time, energy and $$ invested in it, I want to address all possible issues! I will check the repair plate and screws carefully at the next haulout and if there is any evidence of stress or screws "working" I will upsize them to 1/4 inch. Assuming, of course, that there is not a catastrophic failure in the interim...
Re: Ericson 27 Project
Posted: Fri Jul 01, 2011 11:51 am
by mitiempo
With the bar through the mast firmly attached to the spreaders and therefore taking all the compression load there should be almost no loading on the plates.
Re: Ericson 27 Project
Posted: Sun Jul 10, 2011 2:00 am
by bigd14
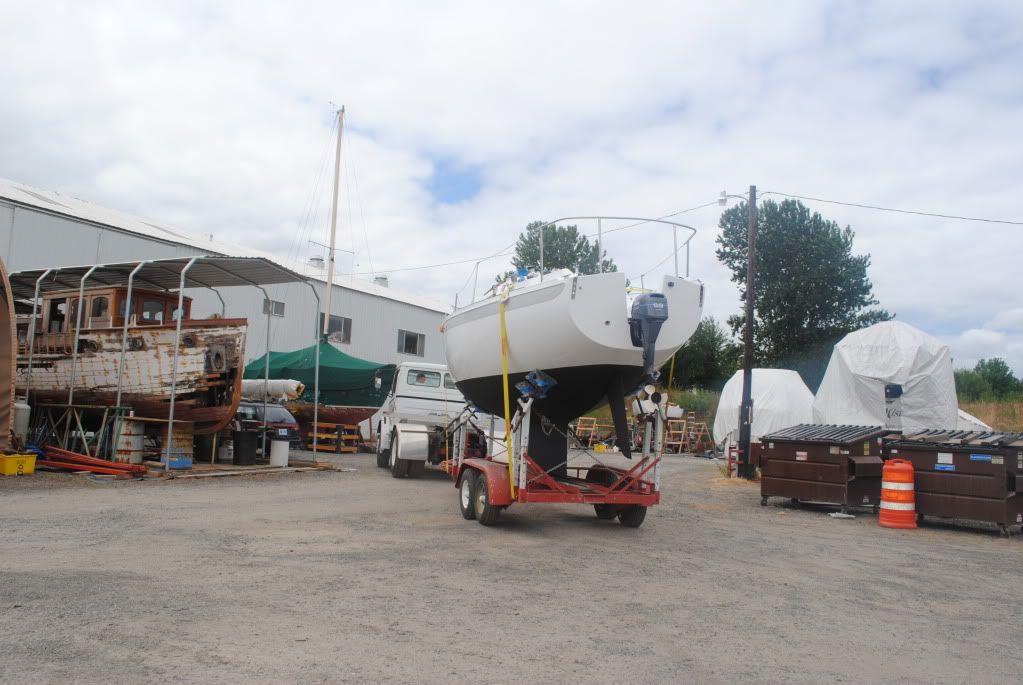
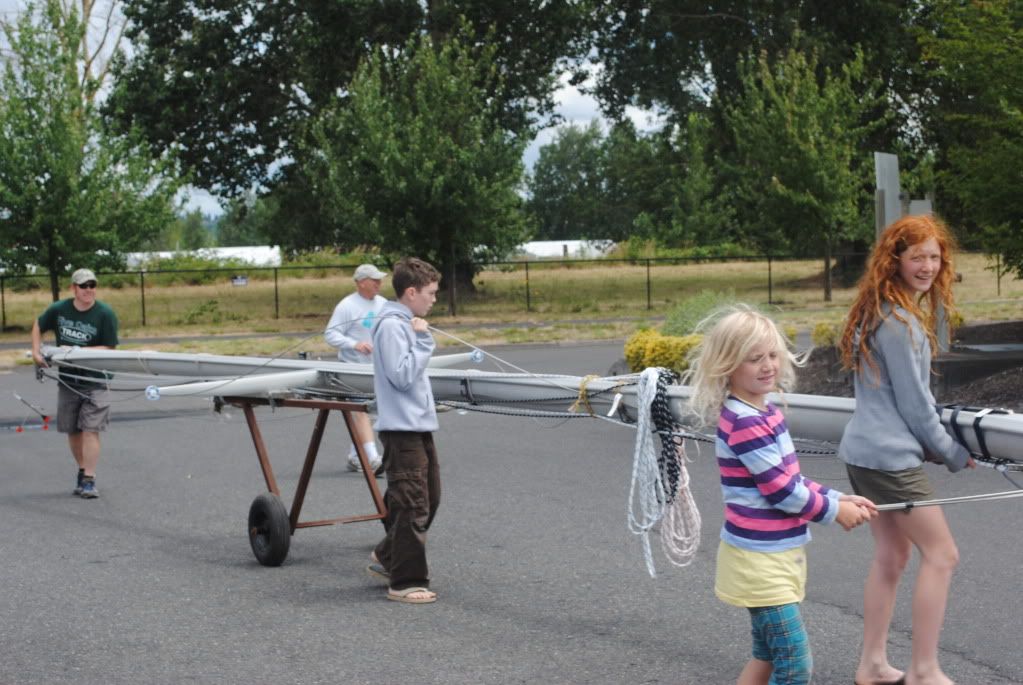
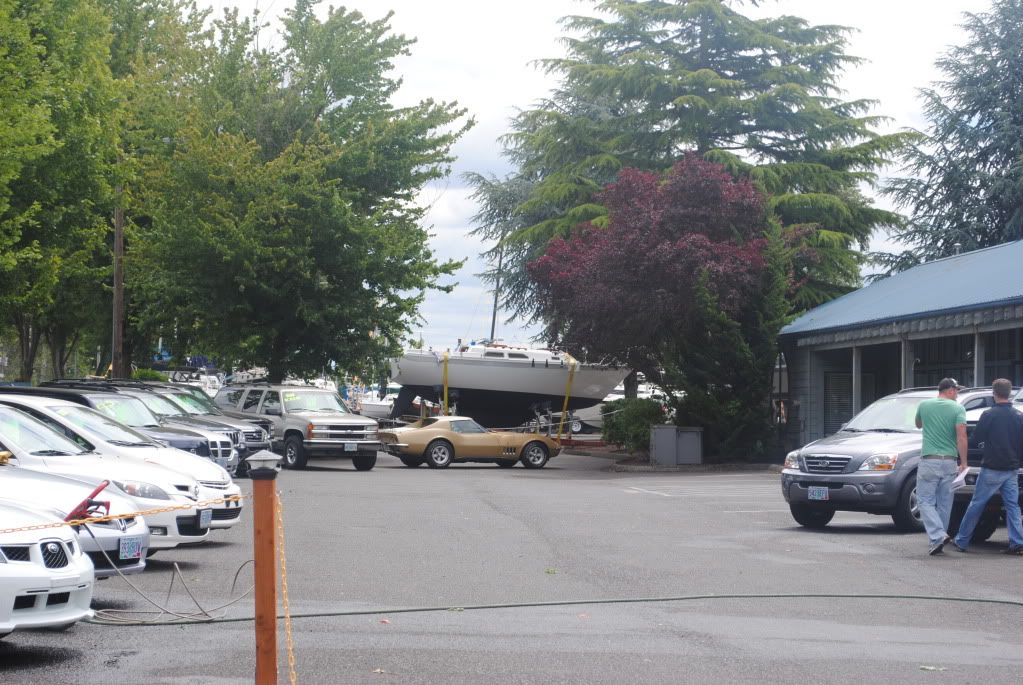
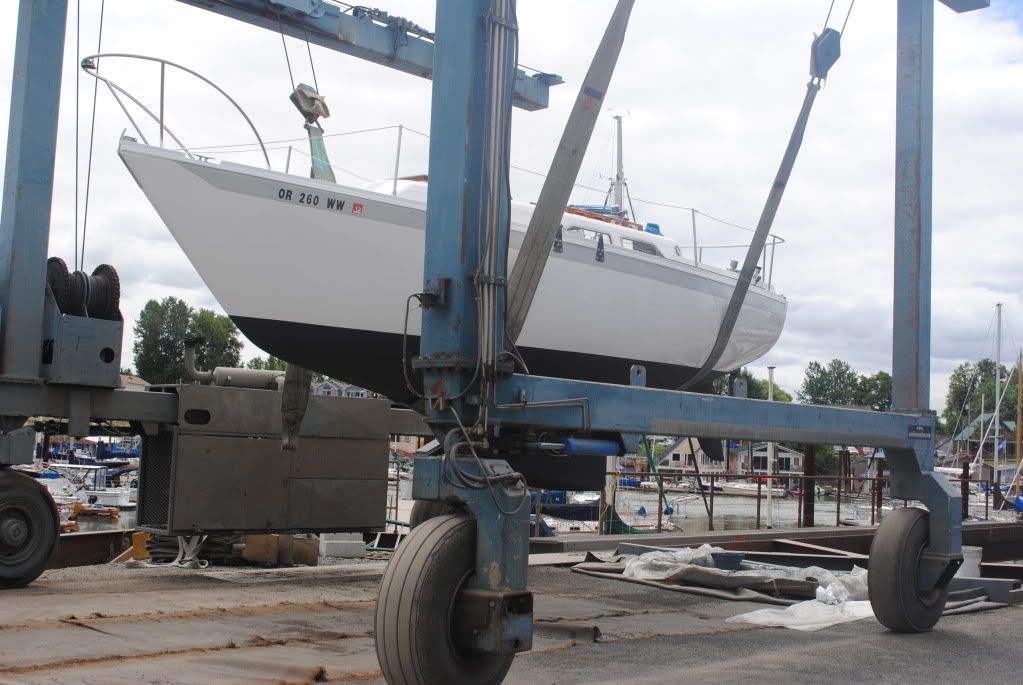
After 1030 days in the yard, lots of dust, many $$ and a ton of learning we finally reached the end of the line this weekend! A HUGE thank you to all of the Plastic Classic Forum denizens for your advice, support and comments. I literally could not have done it without you! Truly an amazing resource.
Heading out of the yard yesterday (I'll miss this place!)
Walking the mast over to the TraveLift
Through the trees
Off the trailer for the first time in almost three years
Almost there!

Back where she belongs
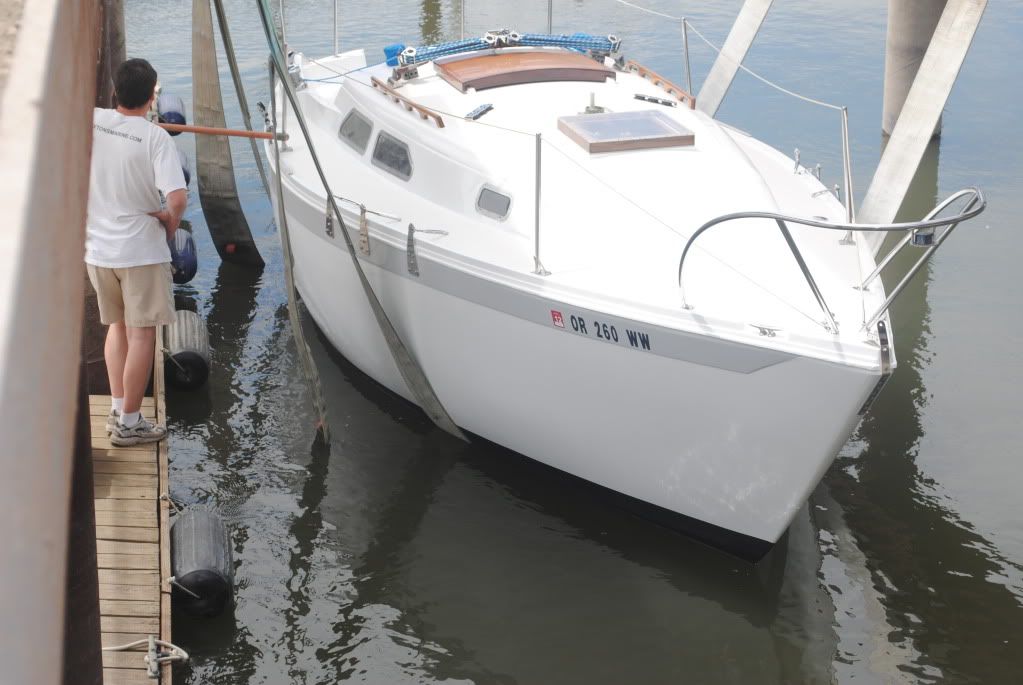
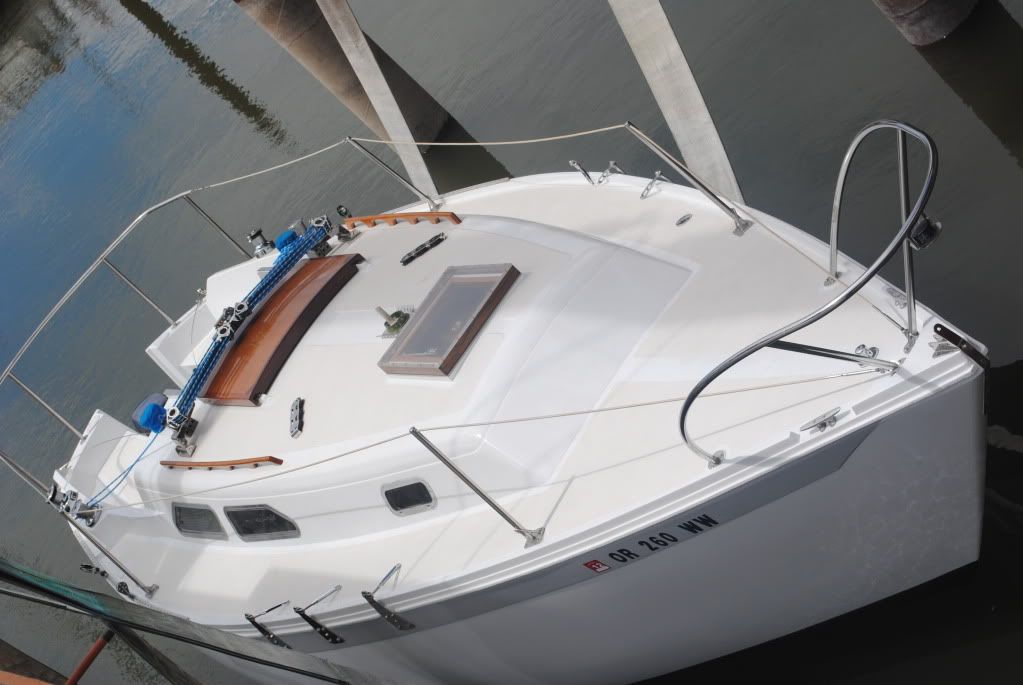
We spent the rest of yesterday afternoon stepping the mast, motoring over to the marina and rigging the jib. Left the camera behind by accident. Only one minor accident along the way, no harm no foul!
Today we spent most of the day rigging up the boat. Jury rigged some mainsail controls and took her out! She handles like a dream.


Hey where did that bungie come from!


The only downside to the day is the realization that the waterline is truly messed up especially on the port side since she leans a little to the port at dock. Wonder why. Not much I can do about it except load up the starboard side and try to even her out a bit. When I haul for bottom paint in a few years I will raise the waterline a bit.
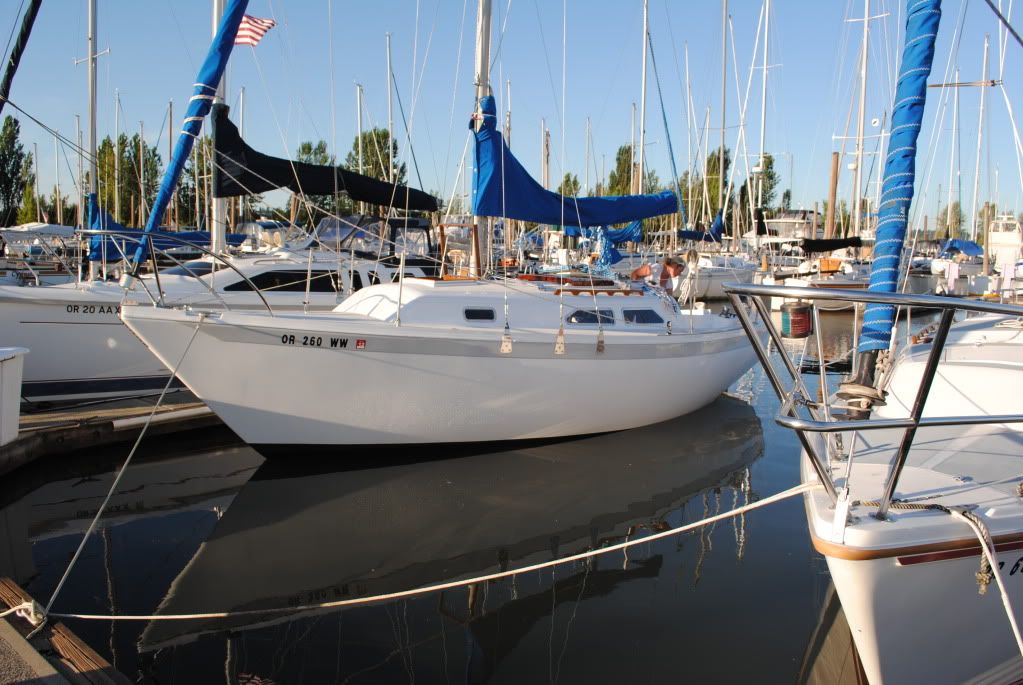
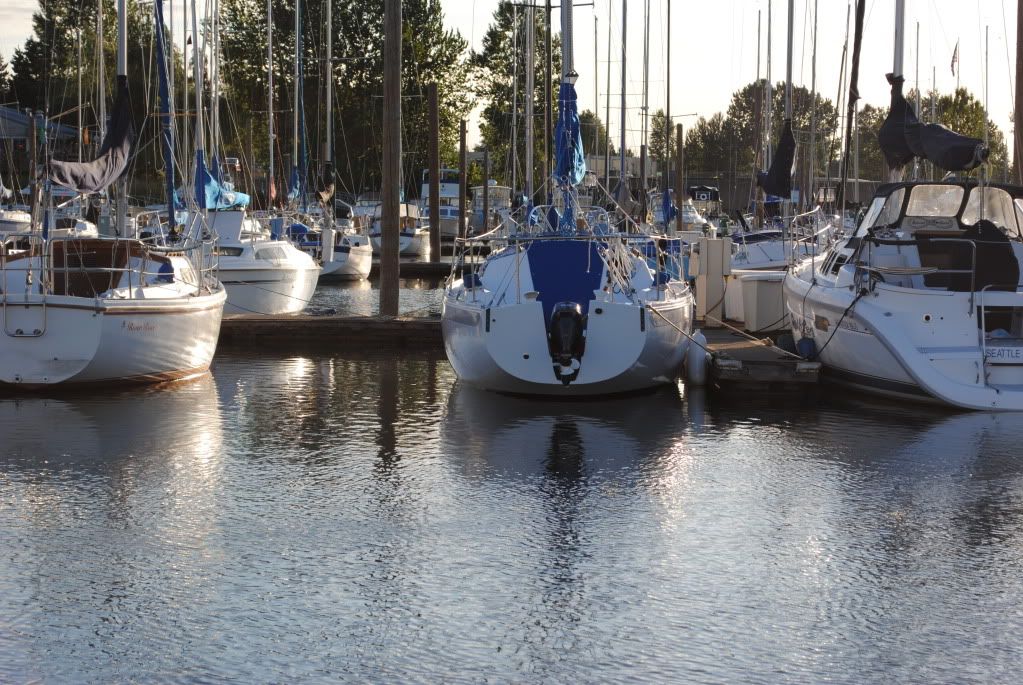
Despite the waterline issue, I am extremely happy with the overall project. Still a lot of tweaking to do, but thats just the fun stuff.
Doug
Re: Ericson 27 Project
Posted: Sun Jul 10, 2011 4:06 am
by mitiempo
Looking great!
Re: Ericson 27 Project
Posted: Sun Jul 10, 2011 8:20 am
by earlylight
Congratulations on your first class restoration. She looks gorgeous!
Re: Ericson 27 Project
Posted: Sun Jul 10, 2011 9:01 am
by Chris Campbell
She really does look fantastic - essentially a brand new Ericson 27 - well done, and congratulations on your first sail, I can only imagine how rewarding that must have been. Your family will be glad to get you back from the boatyard, too!
Re: Ericson 27 Project
Posted: Sun Jul 10, 2011 11:36 am
by TampaBay
The boat looks fantastic, and the weather is picture perfect. Congratulations, and happy sailing.
Re: Ericson 27 Project
Posted: Mon Jul 11, 2011 11:03 pm
by Triton106
Congrats Doug! You have a good looking boat and a beautiful crew.
Re: Ericson 27 Project
Posted: Fri Oct 07, 2011 10:22 pm
by bigd14
Well, since it seems we went directly from summer to winter here (after a short summer at that), I am back in project mode. Here is a list of stuff I will be working on.
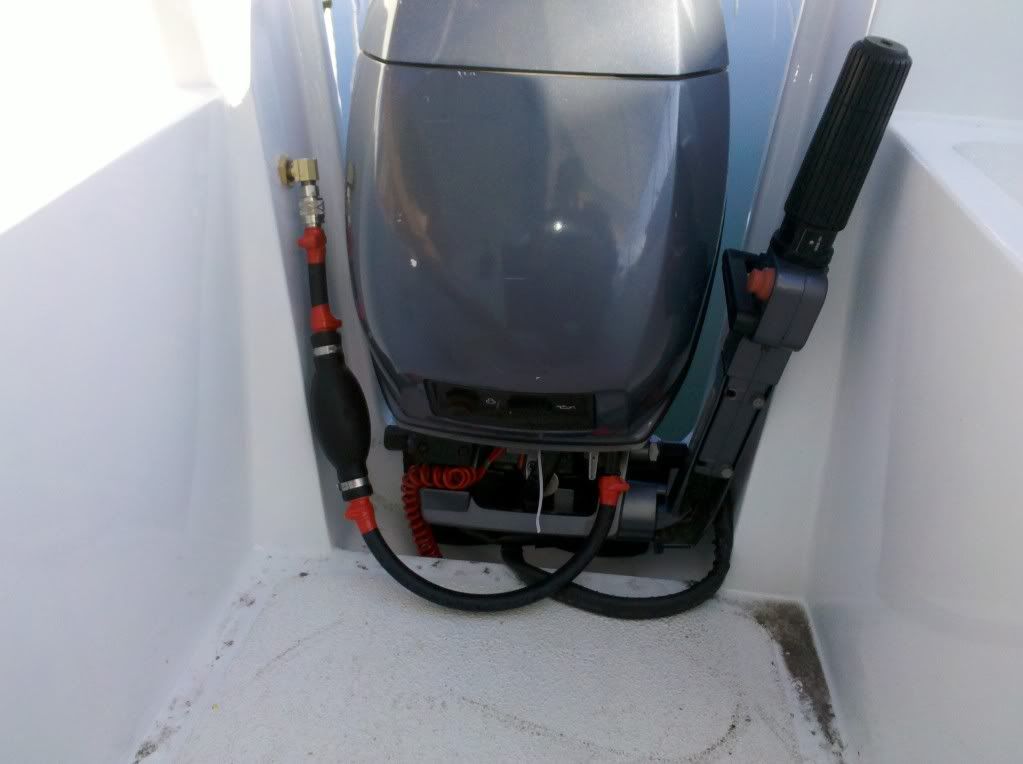
1. Install permanent fuel tank below. Currently I am using a little 3 gallon tank that's sliding around the cockpit. Aside from being annoying, it has a tendency to hit the starter switch while the outboard is tilted out of the water!
2. Install a composting toilet.
3. Install manual bilge pump.
4. Try to cover the throughbolted deck hardware that protrudes into the cabin.
5. Make a folding table.
6. Fix the less-than-satisfactorily rigged boom.
I started measuring for the fuel tank platform and made a cardboard mockup of the 12 gallon fuel tank to see how it will all fit. I lost my camera so I have no photo documentation for now.
So does anyone know of a good aluminum fuel tank manufacturer in the Pacific Northwest? Seems like all the internet searches lead me to east coast companies, and I would prefer not to pay that much for shipping.
Thanks,
Doug
Re: Ericson 27 Project
Posted: Mon Oct 17, 2011 12:29 am
by bigd14
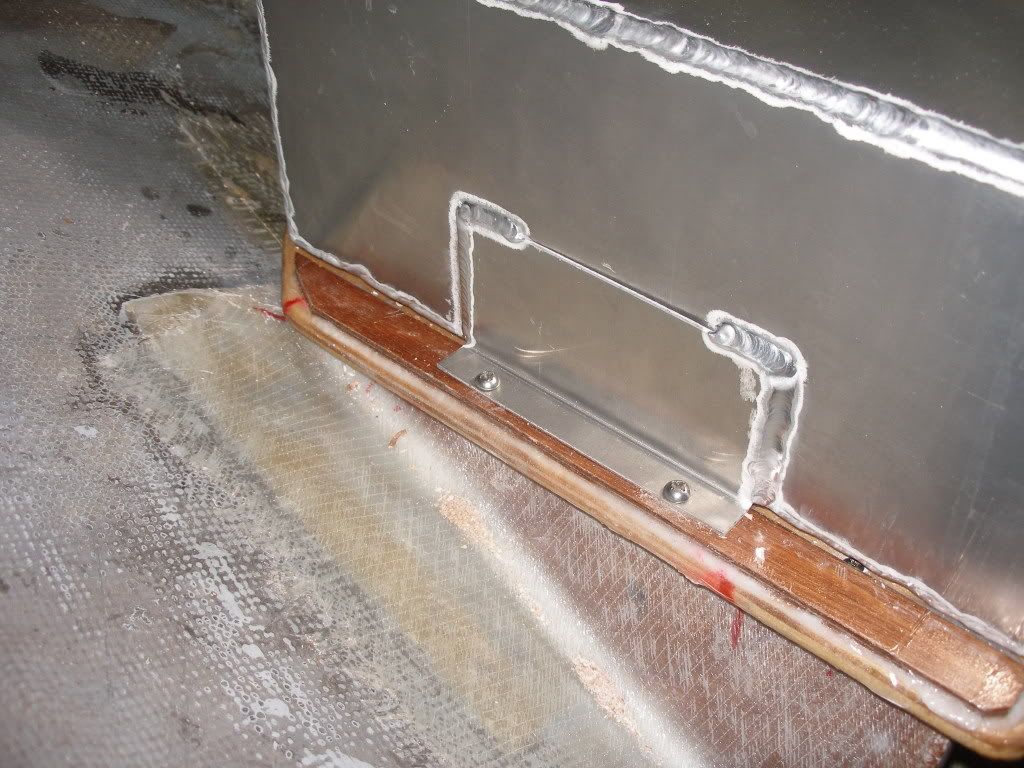
Started work this week on the internal fuel tank. Some time ago in anticipation of this effort, I glassed some mahogany supports to the hull where the old flimsy plywood ones had been:
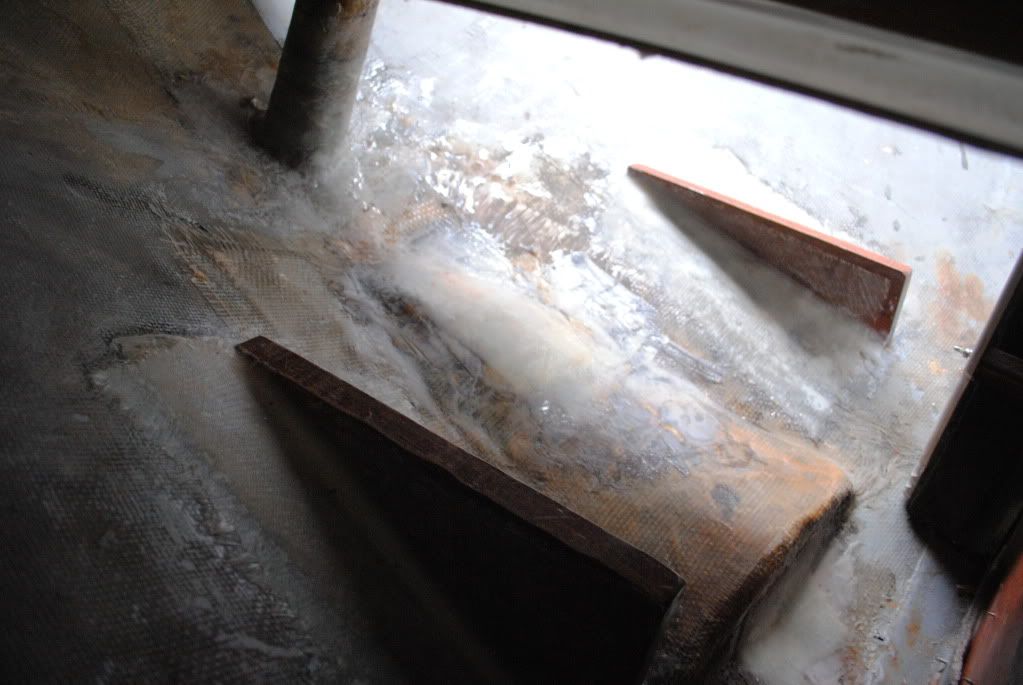
I made up a plywood shelf and covered it with a layer of 10oz fiberglass to add stiffness and prevent wear and water intrusion. Then tried to screw it into the supports. This took much longer than I thought it should, since the back of my drill kept hitting the bottom of the fiberglass cabin liner and I couldn't really see what i was doing. So I have a few extra holes to fill. I will ensure that the screws are well countersunk and covered with tefgel before I install the tank.
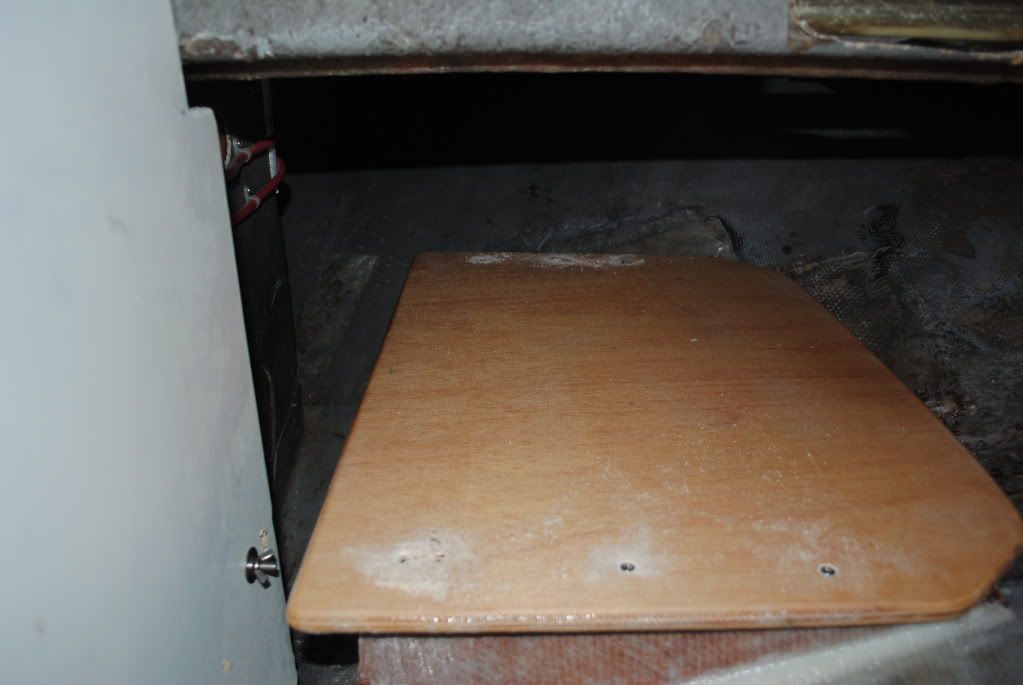
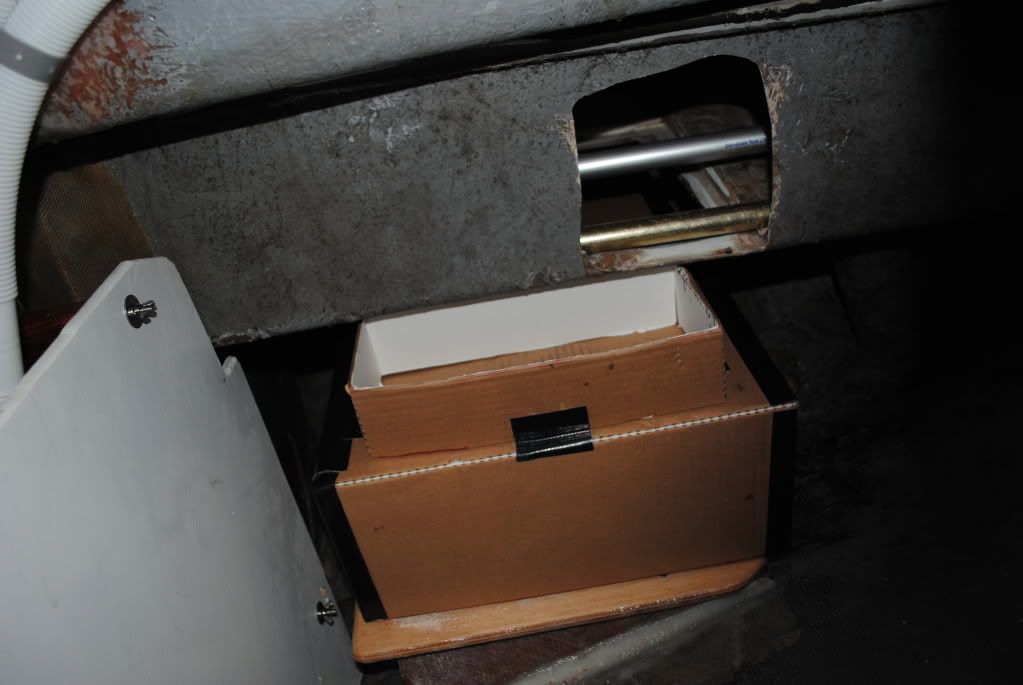
I mocked up a 12 gallon tank out of cardboard to see how it would fit.
I found a used tank which should arrive in the next few weeks. I'll give it a thorough going over and test for leaks prior to installing, but thats the next step.
Re: Ericson 27 Project
Posted: Mon Oct 17, 2011 12:42 am
by mitiempo
Looks good. Be sure to have the tank pressure tested before you put it in - many leaks will not show up without pressure.
Re: Ericson 27 Project
Posted: Sun Dec 04, 2011 2:14 am
by bigd14
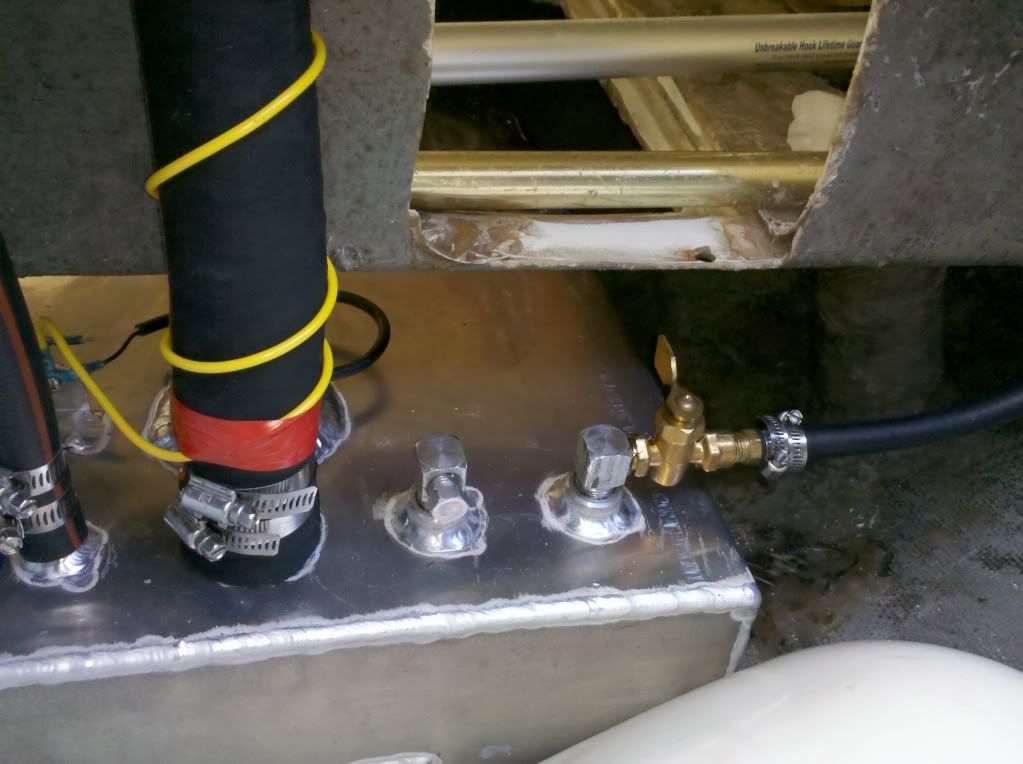
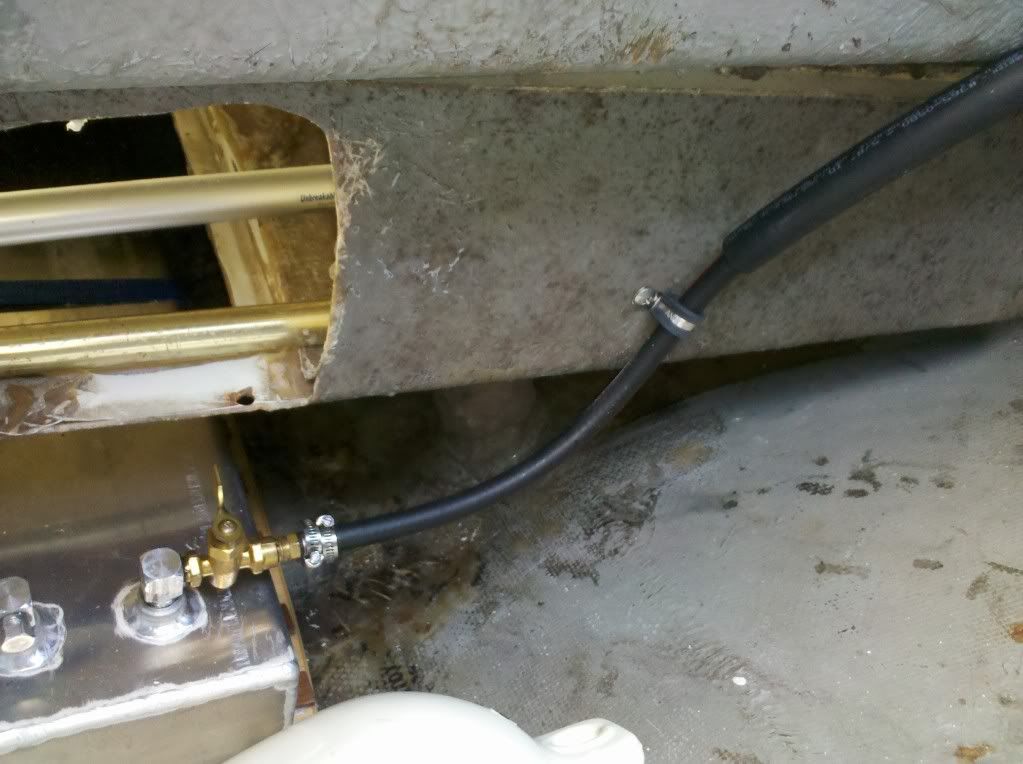
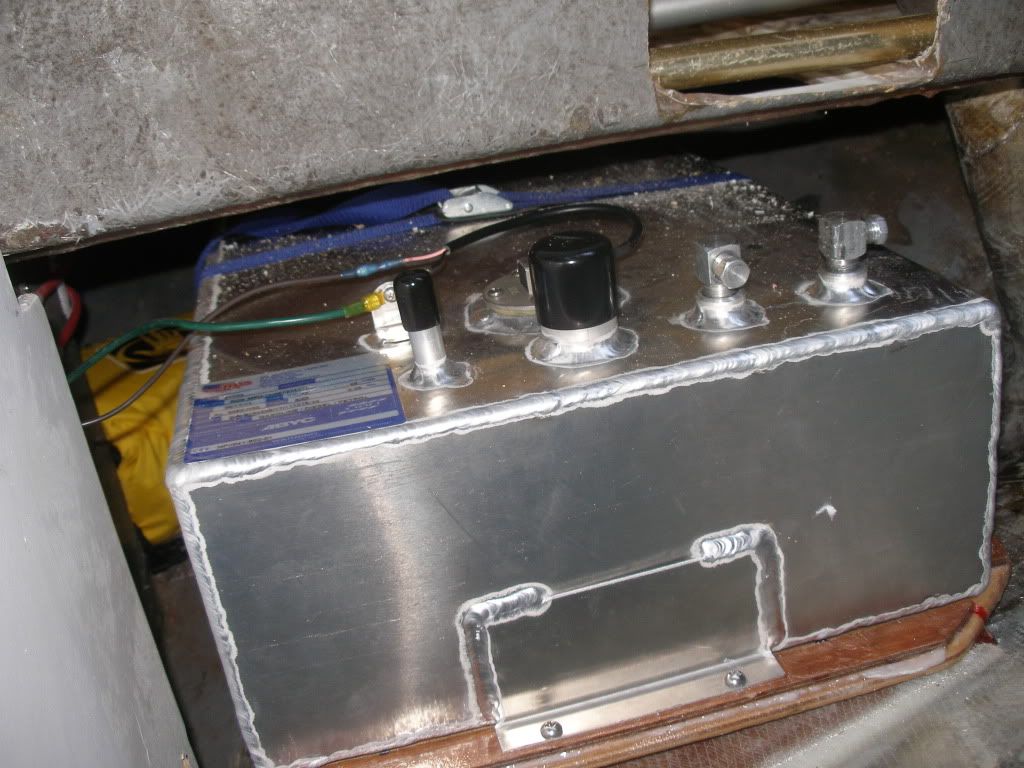
Since the last posting I bought a used tank, which turned out to be junk, then purchased a new tank. I spent a lot of time fighting with the tank installation. This was the result of poor planning on my part. I put the stringers on the hull a long time ago, and of course the anchor points for the new fuel tank fell too close to the stringers for an easy install. So I had to excavate out a couple areas for the nuts to fit when i bolted the fuel tank to the platform. Much more difficult than it should have been.
Here are a couple shots of the tank in place:
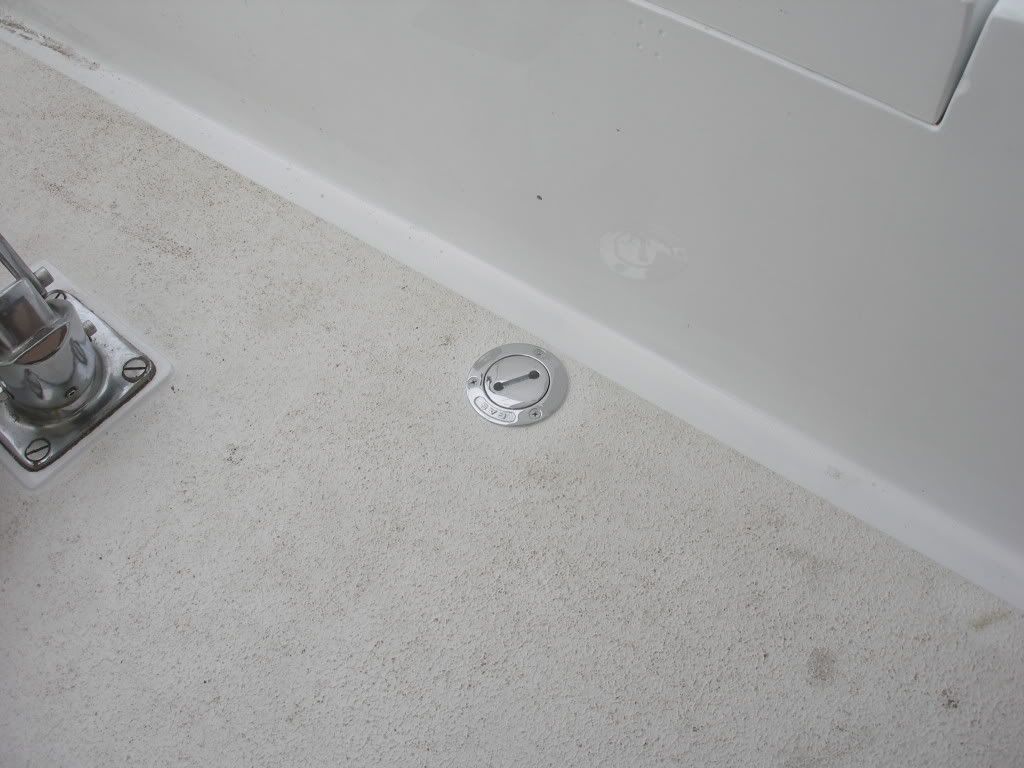
I also made a horrifying discovery when cutting a hole in the cockpit sole for the fuel fill. The sole core is wet! It is still sound, so until now I have always thought it was ok, but I sure wish I had known this a couple years ago! I am going to leave it for now until it becomes a problem.This is right next to the old fuel fill, so maybe it doesn't extend too far.
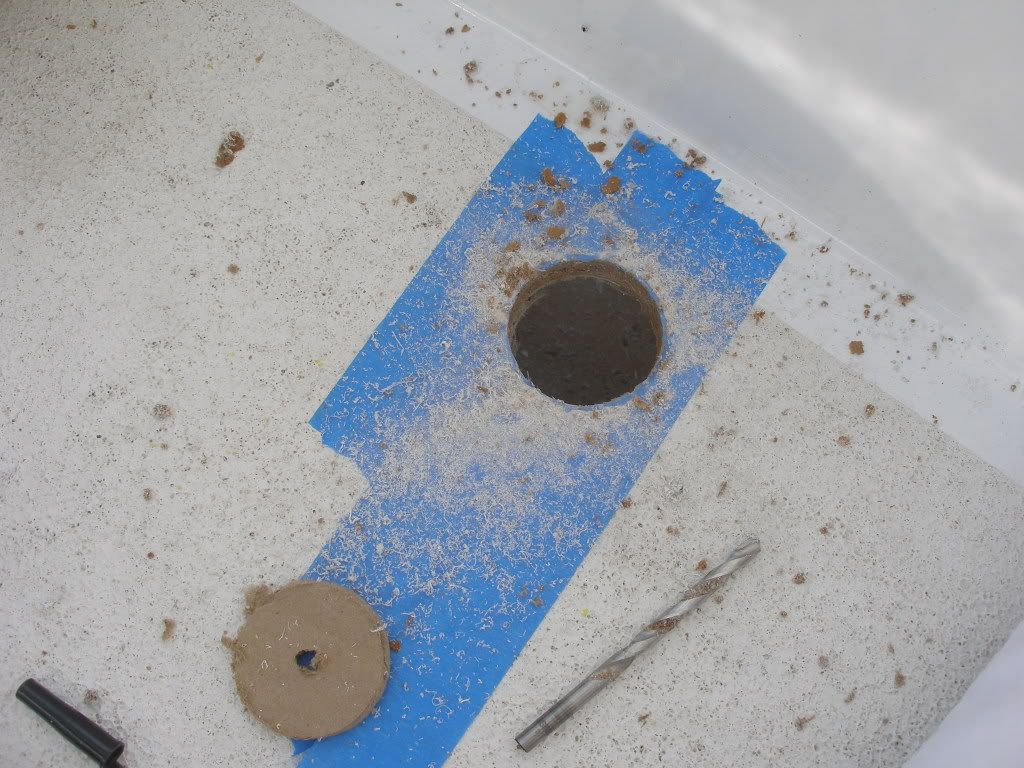
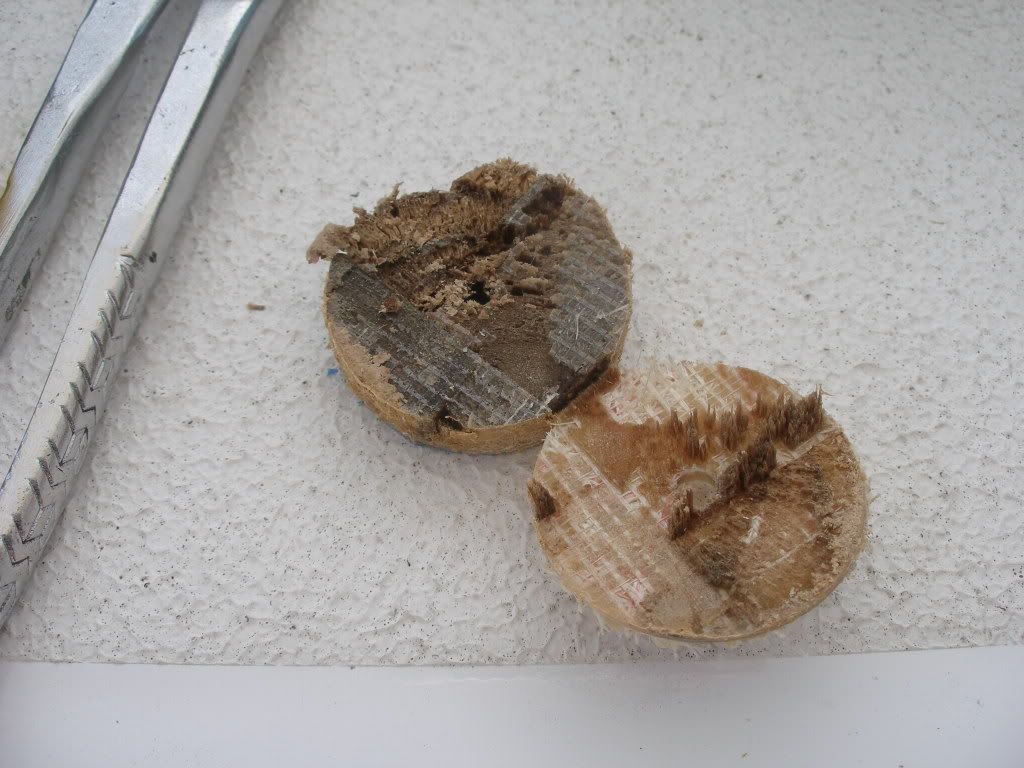
I did the standard rout out and fill with epoxy.
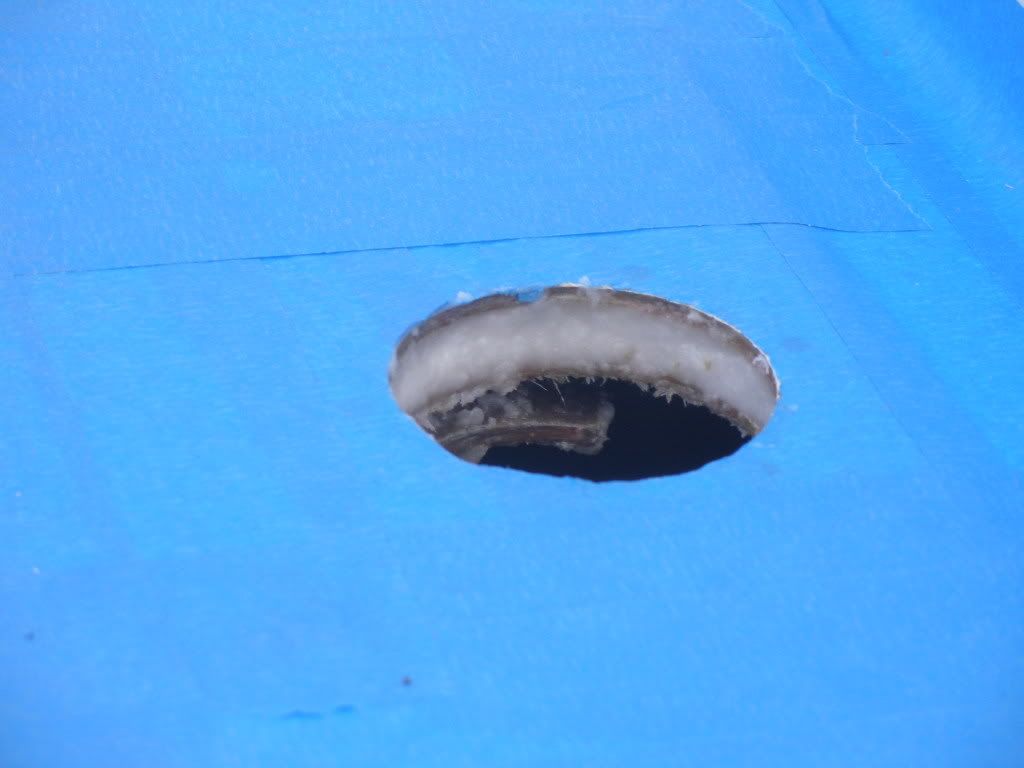
And after curing overnight with a heater in the lazarette, mounted the fill with sealant:
Re: Ericson 27 Project
Posted: Sun Dec 04, 2011 3:30 am
by Skipper599
Why do photos not appear in your last post? I right clicked on the X's and clicked on "Show pictures" but nothing happens.
Re: Ericson 27 Project
Posted: Sun Dec 04, 2011 5:19 am
by mitiempo
Doug
Looks good but one problem. Many tanks rot from the bottom because they are installed like yours. When (not if) moisture gets under the tank it can't escape and will start corroding the tank bottom. The tank should be held above the base, either with aluminum pads welded to the tank corners or rubber pads placed where necessary. Otherwise it won't be a long lasting tank.
Re: Ericson 27 Project
Posted: Mon Dec 05, 2011 12:10 am
by bigd14
Hey mitiempo- What is not shown in the photos are the slats I epoxied on the platform so that there is a lot of airspace under the tank. I am also in a freshwater environment. Hopefully that will be enough to keep the tank healthy for a long time.
Thanks!
Doug
Re: Ericson 27 Project
Posted: Fri Dec 16, 2011 11:49 pm
by bigd14
Re: Ericson 27 Project
Posted: Sat Dec 17, 2011 2:01 am
by mitiempo
Did you use teflon tape or thread sealer on the fittings?
Re: Ericson 27 Project
Posted: Sat Dec 17, 2011 10:57 pm
by bigd14
I used the goop the local chandlery recommended. Form a gasket number 2 I think. Hopefully that's the right stuff...
Re: Ericson 27 Project
Posted: Sat Dec 17, 2011 11:18 pm
by mitiempo
The reason I asked is that I couldn't see any on the threads.
Re: Ericson 27 Project
Posted: Sun Dec 18, 2011 3:22 pm
by bigd14
Well, I work clean! (says I, rubbing the bald spot where I had to cut away the hair from the last time some epoxy got stuck in it)
I learned the hard way that this stuff is incredibly messy, so I tried to minimize the amount spread around. Also, the photos are lo res shot with my cell phone. My camera has gone missing.
My next projects on the boat are to build a cabin table, clean up some running rigging such as the outhaul and backstay, and install a composting toilet. We had an incident with the port a pottie this summer that I do not care to repeat...
Oh and one of these days I'll figure a way to cover the exposed nuts and backing plates on the cabin ceiling. And a bunch of other things that come to mind. Will it ever end?
Re: Ericson 27 Project
Posted: Thu Jan 12, 2012 4:18 pm
by Poco A Poco
Yes, it will end when you find your next boat!
Congrats on a well done job!
Re: Ericson 27 Project
Posted: Sat Jan 14, 2012 9:14 pm
by Paulus
Nice job.