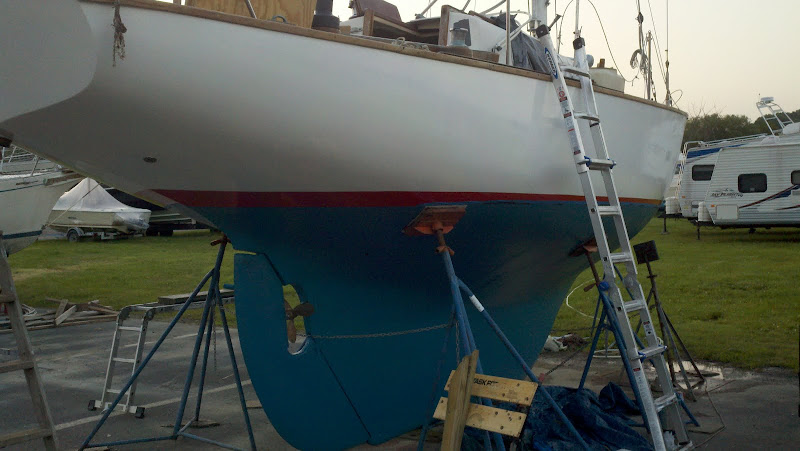
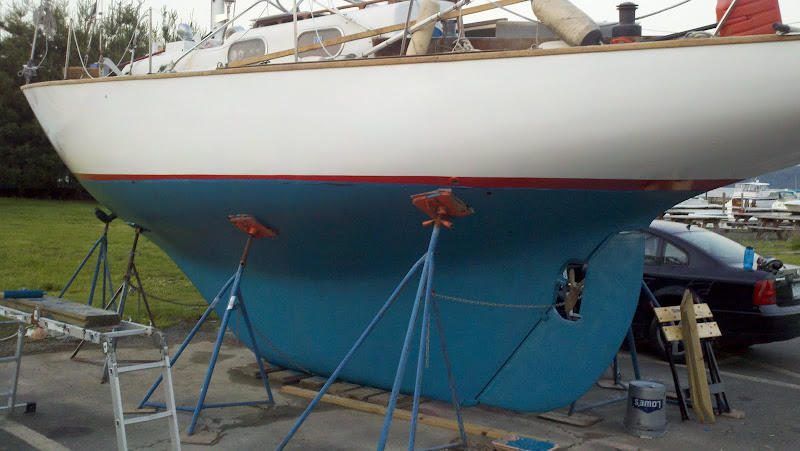
Alberg 35 Refit

Post photos and descriptions of your ongoing projects here. No project is too big or too small.
Post Reply
brob76
Deck Grunge Scrubber
Posts: 29
Joined: Mon Dec 14, 2009 1:45 am
Boat Name: Auriga
Boat Type: Alberg 35
Location: NYC

Alberg 35 Refit

Post by brob76 »

I've been meaning to document the refit of my Alberg 35, Auriga, but I've been so busy working on her the last few months, I haven't had time. So, here goes:

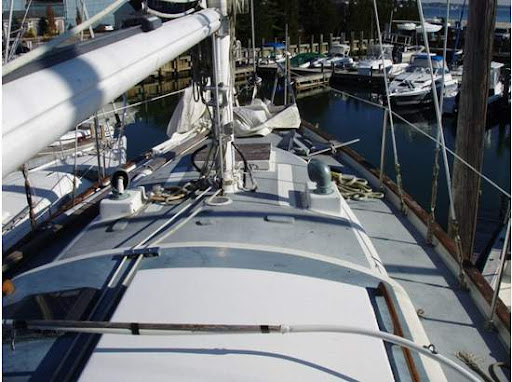
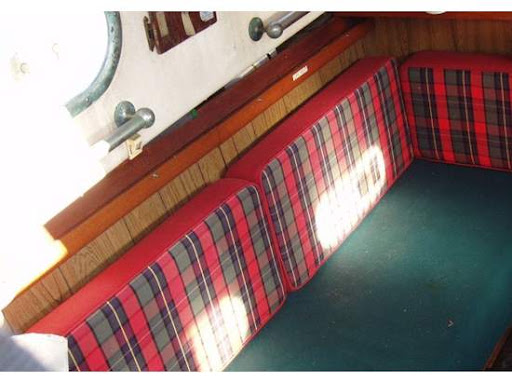
When purchased, Auriga seemed to be a well cared for boat for her age. She had the same issues most boats from this era suffer from. Rotten core from numerous leaking deck fittings, rotten mahogany rudder, swages and other rig components showing signs of deterioration, leaky ports etc. The good news was that she was repowered with a Universal M25XPB in the last ten years so that was one less thing to worry about. Another interesting upgrade was the "behind-the-mast" roller furling main sail (I'm actually planning on removing the furler and going back to a slab reefing mainsail after this season). She also has a fairly new Furlex furler for the headsails.

Photos of Auriga as purchased:
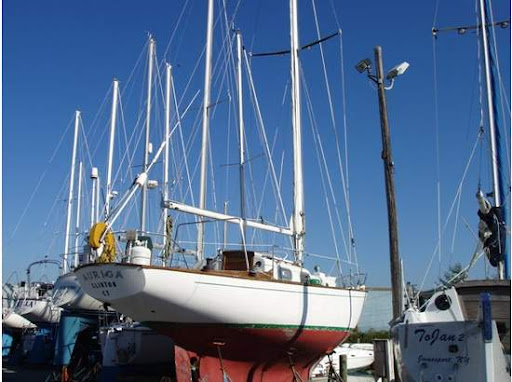
Image

Image

Image

Image

Image

This past October, I brought her from the east end of Long Island back around to the Hudson where she is now on the hard. It was a two day trip motoring all the way. After I got her hauled out, the first order of business was to rip out all of the superfluous junk the previous owner had installed such as the helmsman seat (seen in the picture above), the incredibly dodgy LPG system (I won't even go into what I found), the old fresh water system, a ton of junk in the cabin, the list goes on. After all this stuff was cleaned out, I started focusing on structural issues. I plan to make this a multi-year refit so this year I wanted to focus on the most important seaworthiness issues. The biggest things were the rudder, deck, thru-hulls and drive-train (shaft, stuffing box, coupling and prop).

I started with the rudder. I won't go into too much detail on the rudder here as its been discussed in another thread: http://www.plasticclassicforum.com/view ... f=1&t=5252. The original rudder would have been fine had someone not barrier coated it in the past. I looks like it was coated with gelcoat (go figure). Water eventually got in and the wood rotted beyond repair. The project is complete now and it turned out pretty well. Below are photos of the old and new rudders. Still need to do a bit more fairing but it's mostly complete.

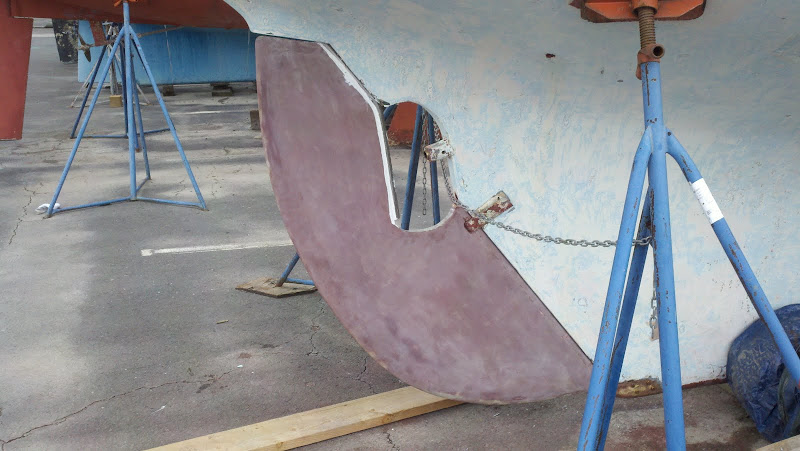
Image

Image

Next, I focused on the foredeck. The previous owner had installed a manual windlass, chainpipe and bow roller. None were bedded properly and the foredeck was completely delaminated. When I pulled the skin up, I found that balsa was completely soaked but, surprisingly, there was little rot. As many on this forum recommend, I decided to replace all the core and lay down new glass on top rather than try to use the old top skin. I built up solid glass pads for all load bearing fittings. The side decks are still quite solid with no signs of wet core. There is a small area on one side of the cabin top that is completely saturated but I haven't gotten to it yet. The previous owner had installed a Bomar hatch on this side and used wood screws going only into the balse to secure it. Needless to say, the core around that area is soaked. The aft deck and cockpit sole have a few soft spots that I'll need to tend to at some point also. The project went pretty well after I got the hang of it. It's a long, sticky job no matter how you do it. I didn't get a ton of photos as I was generally covered in epoxy but here are a few photos of the process:

Working under tarp in the dead of winter. Top skin removed. Scraping out all the balsa.
Image

New core and glass complete.
Image

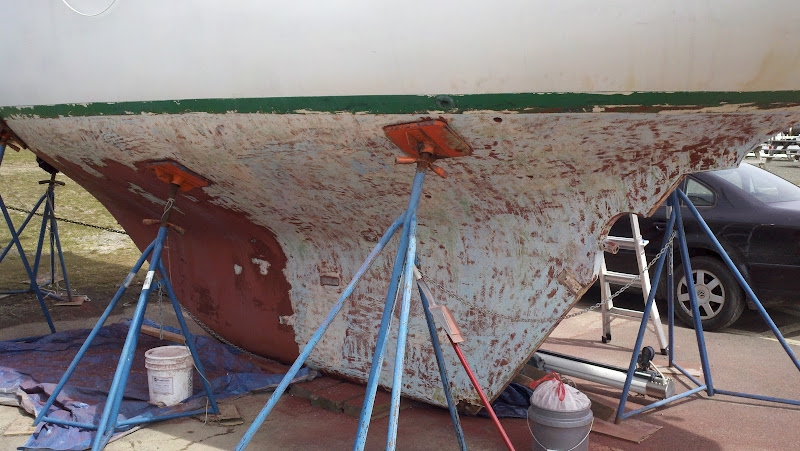
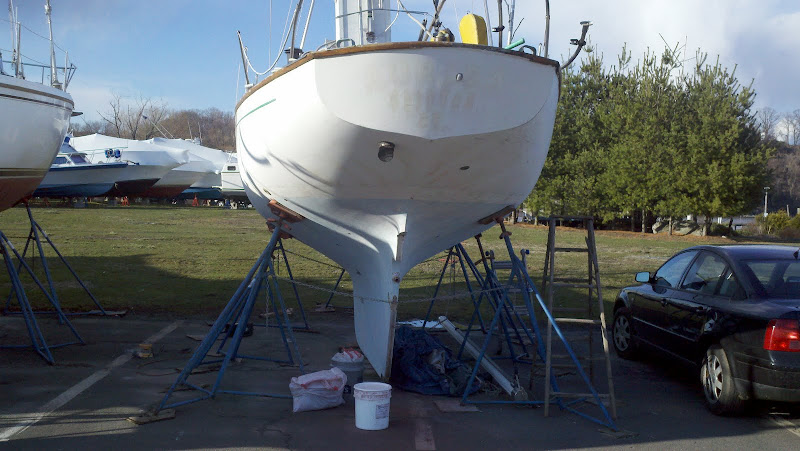
Next, I moved to the bottom. There was a good 20 years worth of bottom paint that was starting to fail in some areas so I decided to take the bottom down to gelcoat. I did 95% of this with a carbide scraper. I followed up with 60 grit on the RO sander to get the residual. I can't recommend the carbide scraper method enough. I used various strippers and sanding in the past and found them nasty and ineffective. The scraper takes a certain combination of brute force and finesse and once you find that right combination it works like a dream. Took me about three days to complete the bottom.

Before commencing.
Image

Starboard after the first few hours of scraping.
Image

Port after a few hours.
Image

Port complete.
Image

Aft view.
Image

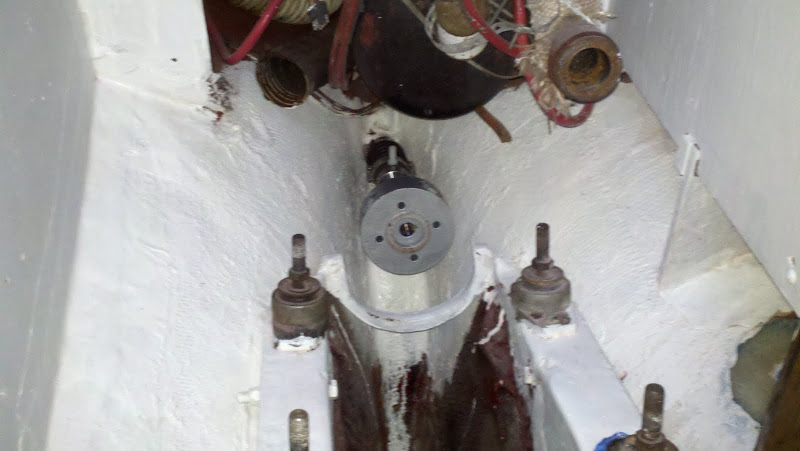
Next, I moved on to the engine and drive train. I needed to remove the shaft to get the upper rudder post out which ended up necessitating the cutting of the shaft. I also wanted to replace the antiquated Sealol shaft seal with a PSS seal. I would have gone with a traditional stuffing box but I couldn't find one with the dimensions I needed. The engine room was a mess. It was painted a dark red which made it difficult to see anything and was generally dirty and greasy. I decided that I might as well pull the engine out and clean and paint the engine room. It would also be infinitely easier to install the new shaft and seal with the engine out. Paint was beginning to flake of the engine in many spots so I used this opportunity to paint the engine as well. I haven't gotten the engine back in yet. Planning on doing that tomorrow. I used the mainsheet and a 2x6 beam over the companionway to hoist the engine off the beds and back onto the salon sole. Photos follow.

Engine room painted and PSS seal installed on the shaft log. In the bottom right hand side of the photo you can see the glass pad I built up and drilled for the new engine intake thru-hull and seacock.
Image

Federal Fleixble coupling installed. Ready for the engine to be dropped back in.
Image

New engine paint.
Image

I am currently working on the seacocks. Auriga, as many boats of this era, had fiberglass tubes rising slightly above the waterline for sink drains and cockpit drains. I've ground all these out, filled the holes and glassed over them. I'm going with a composting head so I eliminated head intake and discharge. I'm routing the galley sink drain back to a tee in the port cockpit drain so that eliminates another thru-hull. The only holes I now have are the head sink/shower drain, engine intake and cockpit drains. I'm using
Groco 3/4" ball valve seacocks for the head sink and engine intake and 1 1/2" Groco ball valves for the cockpit drains. One really interesting and frightening thing I found when removing the head intake and discharge is that there were no thru-hulls. I know that Pearson would sometimes have a tube extending up slightly from the hull with a seacock mounted to it in lieu of a thru-hull but these were just flanged seacocks (tapered plug) through bolted and bedded down to the inside of the hull. Seems quite dodgy to me.

I'm planning to launch in about three weeks. My to do list is:

1.) Drop engine back in and roughly align shaft. More precise alignment will be done after I've had her in the water for a week or so.

2.) Complete seacock/thru-hull installs.

3.) Install bilge pumps. I'm installing a Rule 3700 gph manual pump and a small Rule 500 auto pump. I'm building a bridge about 8" from the bottom of the sump where the 3700 will live. I will have a rule float switch and will be wired to a three-way switch near the companionway. There will be another board coming down from the bridge (in the shape of a T) that will extend to the bottom of the sump. The 500 will live there. The 500 will be wired direct to the battery. The 3700 will discharge from the original fitting just above the bootstripe and the 500 will discharge in the cockpit.

4.) Finishing fairing/painting fordeck and reinstall deck fittings.

5.) Paint topsides. I'm using Interlux Perfection in the roll and tip fashion.

6.) Prime bottom with a coat or two of epoxy and bottom paint.

7.) Install fresh water components. Auriga has the two original Monel tanks and a Plastimo flexible tank under the V-berth. I'm installing all new vinyl PVC hose and making a simple PVC manifold for isolating tanks. I'm going with fresh/sea water in the galley and fresh in the head all pumped with Whale foot pumps. I got lucky and found a three Whale MK3 foot pumps locally from a guy parting out his boat after it got smashed up. They were almost new and he sold them for $40 each. Seems like a pretty good deal. I need to clean the Monel tanks. Anyone know of a good method of cleaning Monel water tanks with very limited access?

There will be a few other things added to the list I'm sure. Pictures and progress reports to follow.
User avatar
Rachel
Master of the Arcane
Posts: 3044
Joined: Tue Dec 07, 2004 7:59 pm

Re: Alberg 35 Refit

Post by Rachel »

Ooh, great report! And great progress too :)

The photo series of the bottom paint coming off - I could just about feel the boat sighing with relief.
Ric in Richmond
Boat Obsession Medal Finalist
Posts: 518
Joined: Fri Sep 09, 2005 12:26 am
Boat Name: Andiamo
Boat Type: Alberg 35
Location: Richmond VA

Re: Alberg 35 Refit

Post by Ric in Richmond »

Looks like it is coming along great!!!

Those glass tubes for the drains creep me out!!!! I figure she is 49 and hasn't sunk yet so I am probably ok. How did your look when you pulled them out? They didn't break off in your hand or anything like that did they???
Ric Bergstrom

http://andiamoadventures.blogspot.com/

Archived old blog:

http://andiamo35.blogspot.com/

~~~~~([\~~~([\~~([\~~~~~~([\~~([\~~~~~~
~~~~~~([\~~~~~~~([\~~~~~~~~~~~~~~~
brob76
Deck Grunge Scrubber
Posts: 29
Joined: Mon Dec 14, 2009 1:45 am
Boat Name: Auriga
Boat Type: Alberg 35
Location: NYC

Re: Alberg 35 Refit

Post by brob76 »

Thanks Rachel. I'm sure she was quite happy to get all that old paint off. Some areas had failed so bad I could knock off a 2'x2' section by barely touching it. Other took much more work.

Ric, The tubes were pretty solid and took some convincing to get out. The tube for the head sink drain had a slight stress fracture at the base. There were telltale signs that it had been weeping a bit probably for a long time. The other tubes were in good shape. I just worry about something smacking and fracturing one of the tubes (particularly at the base) while offshore and having no way to stem the leak. I had the same thought: she hasn't sunk in 50 years so she should be OK for another few seasons. But, I decided to go ahead and tackle the project this Spring. Makes me feel a bit more secure to be able to shut off a seacock if something starts leaking.
galleywench
Skilled Systems Installer
Posts: 188
Joined: Mon Jan 05, 2009 10:21 pm
Boat Name: TBD
Boat Type: Rhodes 19
Location: Canterbury, NH
Contact:

Re: Alberg 35 Refit

Post by galleywench »

Wow, I just noticed this thread and have to commend your efforts. You have done a ton of work in a very short time. I wish I was a few weeks away from a launch.
1963 Rhodes 19 #731
http://www.fernhollow.net
brob76
Deck Grunge Scrubber
Posts: 29
Joined: Mon Dec 14, 2009 1:45 am
Boat Name: Auriga
Boat Type: Alberg 35
Location: NYC

Re: Alberg 35 Refit

Post by brob76 »

Thanks. I got laid off a few months back so I've had nothing but time to work on her. One thing I'm starting to notice is that old boats demand every spare moment (and dollar) you have...at least in the initial refit stage. Eight hours seem to pass in what seems like no time. Beginning to seem like a full time job only I'm paying rather than getting paid. I'm trying to get her in the water sometime next week so I can starting looking for a job that actually does pay. The only thing holding me up is weather. I've had the topsides prepped and ready to paint for two weeks now but, as anyone in the Northeast will attest to, it has rained nearly every bloody day this Spring. I'll post some pics of the progress soon.
triton318
Master Varnisher
Posts: 108
Joined: Mon Oct 08, 2007 3:34 pm
Boat Name: Dove
Boat Type: Pearson Triton
Location: Hayes, VA

Re: Alberg 35 Refit

Post by triton318 »

brob76 wrote:I can't recommend the carbide scraper method enough.
I'm guessing you'd also recommend the scraper you used -- what make and model was it? How many blades did you use?

Thanks.
Jay
Dove, Pearson Triton #318
Hayes, VA
brob76
Deck Grunge Scrubber
Posts: 29
Joined: Mon Dec 14, 2009 1:45 am
Boat Name: Auriga
Boat Type: Alberg 35
Location: NYC

Re: Alberg 35 Refit

Post by brob76 »

I think any carbide scraper would work well. I'm sure there are some handles that are more comfortable than others but the one my local Lowes carries worked quite well for me. It's a Finish Factor Soft Grip carbide scraper like this one:
Image
I think I went through about 8 double-sided blades.
triton318
Master Varnisher
Posts: 108
Joined: Mon Oct 08, 2007 3:34 pm
Boat Name: Dove
Boat Type: Pearson Triton
Location: Hayes, VA

Re: Alberg 35 Refit

Post by triton318 »

Thanks for the info. I'm reconsidering whether or not to remove the decades of bottom paint from my Triton. I've never used a scraper, but from the results you describe, I may attempt it. I don't understand why the blade doesn't bite into the gel coat, but I guess it doesn't if you use the correct technique. Whatever that may be!
Jay
Dove, Pearson Triton #318
Hayes, VA
Ric in Richmond
Boat Obsession Medal Finalist
Posts: 518
Joined: Fri Sep 09, 2005 12:26 am
Boat Name: Andiamo
Boat Type: Alberg 35
Location: Richmond VA

Re: Alberg 35 Refit

Post by Ric in Richmond »

triton318 wrote:Thanks for the info. I'm reconsidering whether or not to remove the decades of bottom paint from my Triton. I've never used a scraper, but from the results you describe, I may attempt it. I don't understand why the blade doesn't bite into the gel coat, but I guess it doesn't if you use the correct technique. Whatever that may be!
I have the same brand it will rip some paint off very quickly. Still hard work.

If you have a grinding wheel you can knock the corners off a bit if you are worried about the gel coat. I have found that there really isn't an issue though.

I still favor a porter cable DA sander with some 60 or 80 grit and a vacuum attachment.

Either way get ready to use muscles you had no idea you even owned!!!!

My philosophy is take off anything loose, feather edge it into whatever is well adhered and paint it. Unless you are racing!!
Ric Bergstrom

http://andiamoadventures.blogspot.com/

Archived old blog:

http://andiamo35.blogspot.com/

~~~~~([\~~~([\~~([\~~~~~~([\~~([\~~~~~~
~~~~~~([\~~~~~~~([\~~~~~~~~~~~~~~~
brob76
Deck Grunge Scrubber
Posts: 29
Joined: Mon Dec 14, 2009 1:45 am
Boat Name: Auriga
Boat Type: Alberg 35
Location: NYC

Re: Alberg 35 Refit

Post by brob76 »

As Ric mentioned, it's a good idea to knock the corners off the blade. I did this with my angle grinder but only when scraping awkwardly shaped areas. I did bite the gelcoat in a few spots but nothing a touch of epoxy won't fix.

I'm considering doing a barrier coat while I have all the paint off. I know there are differing opinions on the benefits. The boat has never had blisters but I'm planning to have it in the water for 7+ months a year and wondering if a barrier coat will have any real benefit in reducing water ingress. I'm hoping someone will talk me out of it since I still have plenty of other stuff to do in the next few days. Launch day is tentatively Friday.
mitiempo
Candidate for Boat-Obsession Medal
Posts: 319
Joined: Mon Oct 27, 2008 11:37 am
Boat Name: Mi Tiempo
Boat Type: Canadian Sailcraft CS27
Location: victoria bc canada

Re: Alberg 35 Refit

Post by mitiempo »

A barrier coat can help if the hull is dry enough to apply it. Interprotect 2000 is the most popular choice. 5 coats are recommended and there is a very limited time after the last coat before bottom paint. The last coat should be still tacky when the first coat of bottom paint is applied, or the risk is the bottom paint not sticking. The next coats of bottom paint have no restrictions.

If the hull is not very dry there is no benefit to barrier coating as you will be sealing water in.

How would I decide? How old is the boat and does it (your boat and not the brand) have a history of blisters? If there have not been any or maybe a few small blisters in 20+ years there is no reason to think it will have any in the future.
Ric in Richmond
Boat Obsession Medal Finalist
Posts: 518
Joined: Fri Sep 09, 2005 12:26 am
Boat Name: Andiamo
Boat Type: Alberg 35
Location: Richmond VA

Re: Alberg 35 Refit

Post by Ric in Richmond »

No way no how. I'd never barrier coat the boat.

The gelcoat when you get down to it will be a web of fine cracks. Nothing wrong with it, just not what you expect to see. Ignore them...they do not matter. Prep it, paint it, stick it in the water. Go back to sailing.

You can turn this into a big old nightmare if you go down the path of "ewwww cracks!- I have to fix that".

It is an old super solid FG boat that has old gelcoat on it. It won't blister. If it isn't falling off, sand it and pain it. IF you want to make it a mess, sand it, coat it with something that will not "breathe" and paint it. Then wonder why the barrier coat is creating blisters next time you haul it, then grind that off, then apply a new glass bottom, then sand and paint that.


When you should have just prepped it, painted it, stuck it in the water and went sailing.
Ric Bergstrom

http://andiamoadventures.blogspot.com/

Archived old blog:

http://andiamo35.blogspot.com/

~~~~~([\~~~([\~~([\~~~~~~([\~~([\~~~~~~
~~~~~~([\~~~~~~~([\~~~~~~~~~~~~~~~
brob76
Deck Grunge Scrubber
Posts: 29
Joined: Mon Dec 14, 2009 1:45 am
Boat Name: Auriga
Boat Type: Alberg 35
Location: NYC

Re: Alberg 35 Refit

Post by brob76 »

Thanks Ric. That's all the convincing I needed. The gelcoat below the waterline was in great shape. No crazing and few chips/cracks. The boat has been out of the water since 2005 except for two weeks this past Fall so I figured if I was ever going to barrier coat this would be the time. I decided to slap some bottom paint on her and move on to other projects. She's going in tomorrow.

Image

Image
Ric in Richmond
Boat Obsession Medal Finalist
Posts: 518
Joined: Fri Sep 09, 2005 12:26 am
Boat Name: Andiamo
Boat Type: Alberg 35
Location: Richmond VA

Re: Alberg 35 Refit

Post by Ric in Richmond »

Looks great!!!! Rudder really looks nice!

You aren't going to have any issues with it. I've never seen anything that remotely looked like a blister on mine and she is in the water constantly here in Virginia.
Ric Bergstrom

http://andiamoadventures.blogspot.com/

Archived old blog:

http://andiamo35.blogspot.com/

~~~~~([\~~~([\~~([\~~~~~~([\~~([\~~~~~~
~~~~~~([\~~~~~~~([\~~~~~~~~~~~~~~~
Post Reply