The Plastic Classic Forum, your free and in-depth resource for information on re/building classic sailboats. ... Be sure to visit / join our sister site at sailFar.net! ... And don't forget to check out Atom's Virtual Home Port! ...
This is the place to post your ideas, thoughts, questions and comments as relates to general boatbuilding and reconstruction techniques and procedures (i.e. recoring, epoxy, fiberglass, wood, etc.)
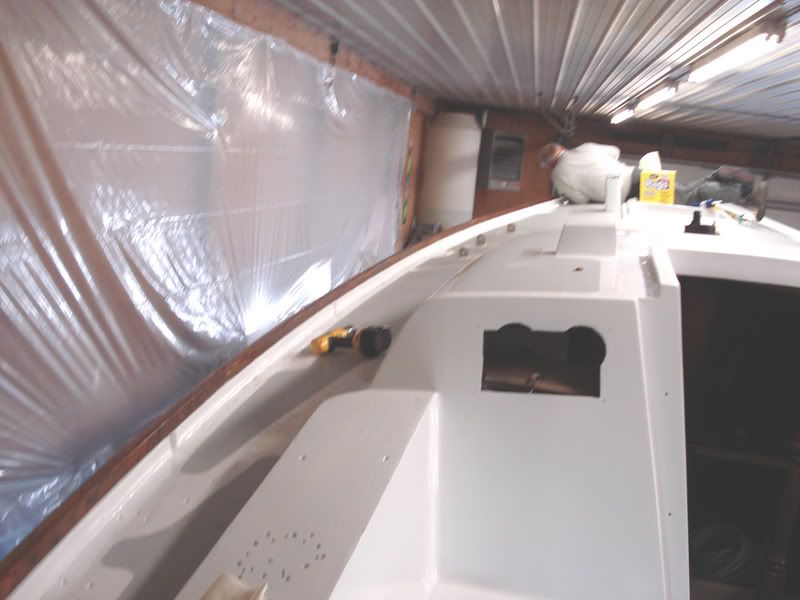
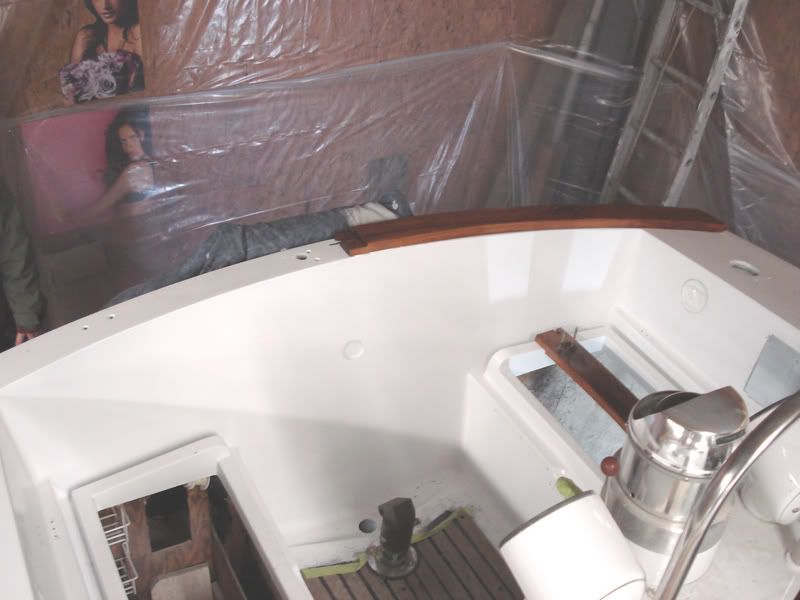
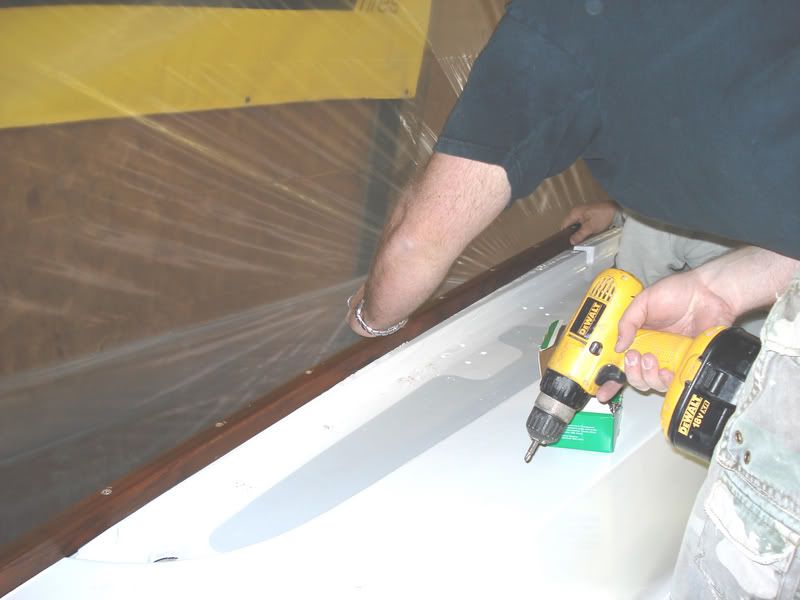
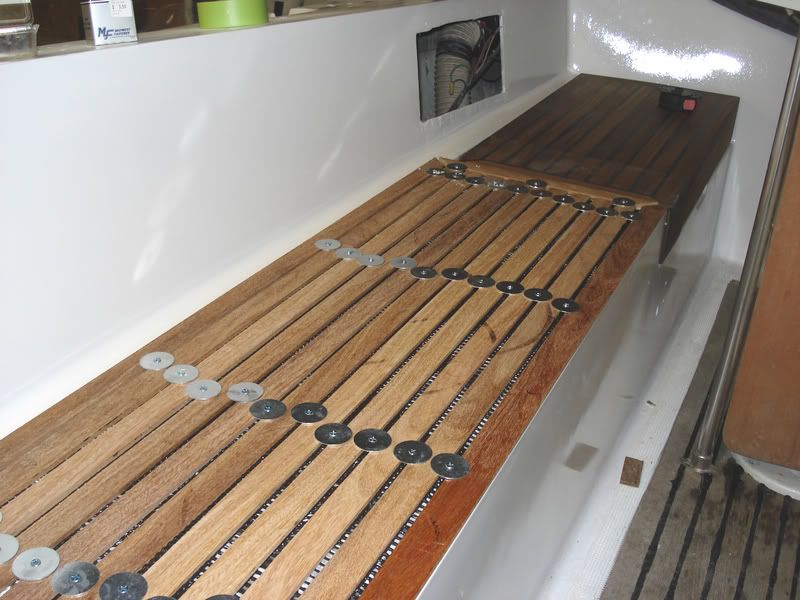
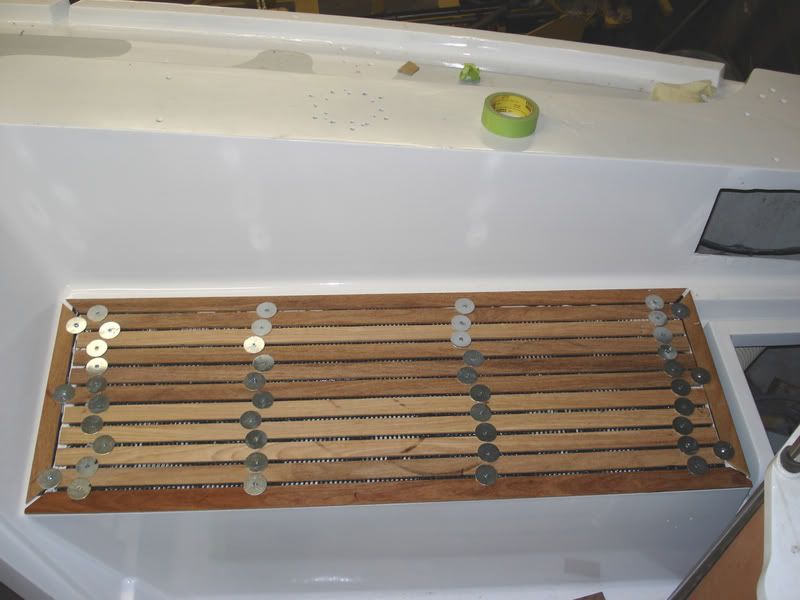
This weekend we installed our teak toerail and teak cockpit seats. Both came out great, the toerail was installed with the 3M 5200 and the teak seats were installed using west system epoxy with filler and black graphite. Here are some pictures.
brucebrown100@yahoo.com wrote:(1) Where did you find those spacers to lay down your cockpit seats?
My guess is they are screws and fender washers. They aren't so much for spacing as for holding the slats down and to keep them from drifting while the epoxy cures. They are in effect clamps. I have seen entire teak decks done this way. No fasteners and no bungs, it makes for a beautiful finish.
Dave Finnegan
builder of Spindrift 9N #521 'Wingë'
-------------------------------------------------------------------------------------------------------------------------------------------------------------------- Gresham’s Law of information: Bad information drives out good. No matter how long ago a correction for a particular error may have appeared in print or online, it never seems to catch up with the ever-widening distribution of the error.
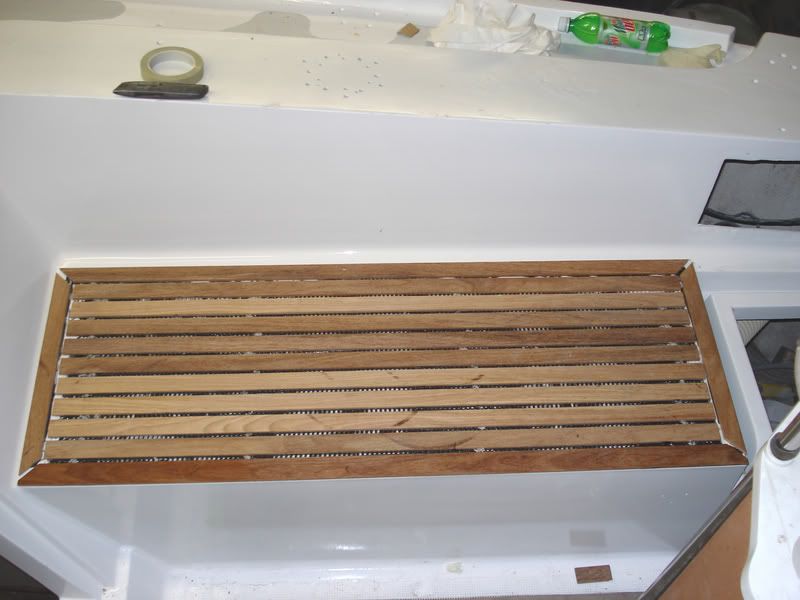
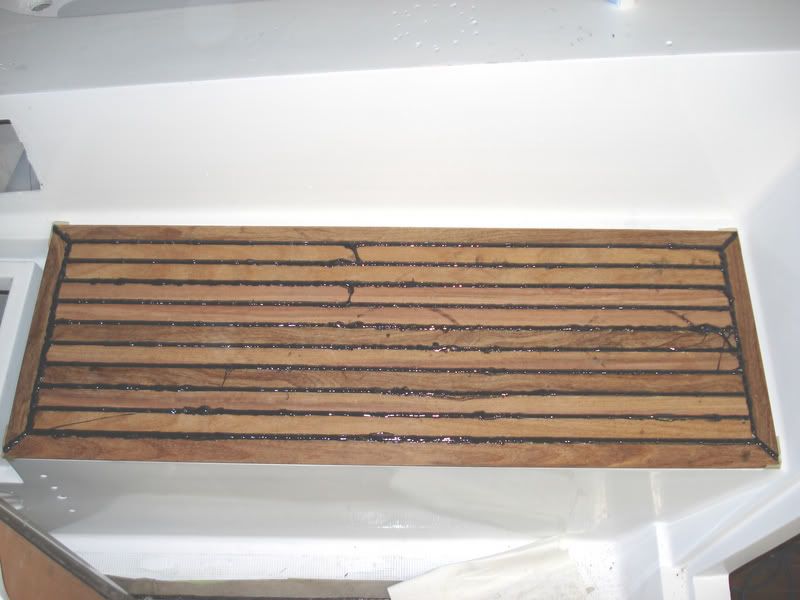
Thanks everyone, he is right they are screws and fender washers to hold the slats down while the epoxy dries. Then the next day you come back and remove them the fill the cracks with the same epoxy mixture.
The strips are 1-1/4" wide and 1/4" thick. It leaves a nice finished look with no plugs to install and sand away.
Is the boat as close to the wall as it looks here? That must have made for some interesting gymnastics when doing all the hull prep and especially the spraying on that side.
The new teak looks nice. Do you have a shot of the starboard side showing the rail from a distance, or didn't you get to that side over the weekend?
---------------------------------------------------
Forum Founder--No Longer Participating
The boat is about 5' from the wall. We got it all on over the weekend we could no take a picture from the starborad side, there is Ag Chem Sprayer (large piece of farm equipment) parked next to the boat making it had to take pictures from the side.
Orginal was just a fiberglass seat, the seat is made just like a deck is with a balsa or plywood core between 2 layers of fiberglass. I then mix up a batch of epoxy with filler, and graphite powder to give it a black color and mixture like peanut butter. I then spread it using a notched spreader (like laying ceramic tile) place the first and second wood strips put a screw and fender washer between the 2 to hold it them down, and so on. All the strips need to be precut so you can move quickly, my Dad and I a seat in about 15min, but thats with all the wood precut. Next day I take and remove all the screws. To fill the cracks (and this takes some time) I mix up some more black west system epoxy and put it in there caulk tubes and run a bead in each grove, putting a little extra where each screw was so it fills the screw hole in. Then the fun part sanding it all smooth, leaving perfect black lines. I had never done this before re-building our cocpit locker doors this winter.