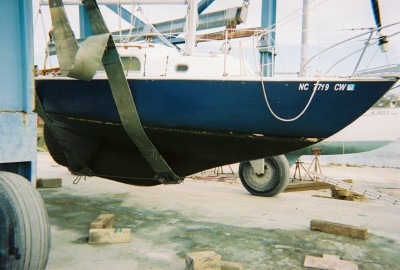
She looked pretty slimy on haul out;
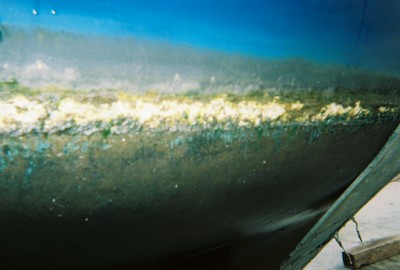
The Slime layer was worst at the water line;
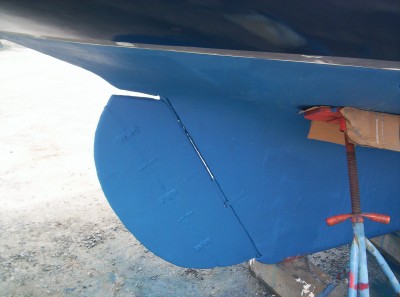
On haul out, the rudder looked pretty good. It was covered in the same slime that had built up over the rest of the hull; :-X
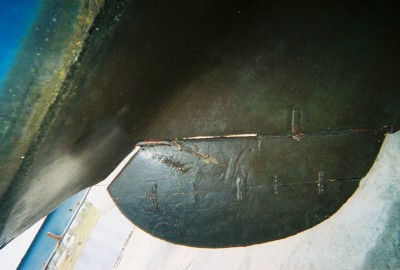
The straps you see were added by the prior owner, Herb Tucker and appear to be holding up well. I did not remove them, but sanded them down, and they seemed to be in good shape. There is a split in the rudder along the seam where 2 planks were joined (I can see at least 5 bronze rods (pins?) that run through from the end. This is a common issue on the wood rudders on these boats.
The split had been filled with some kind of Calk on the last haul out, which seemed like a good compromise to me.
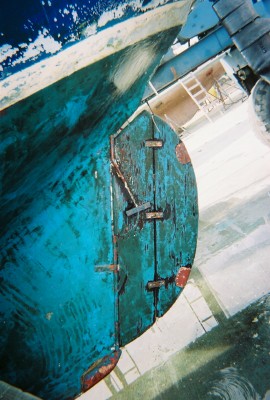
Here is the rudder after pressure wash;
I sanded it, coated it with epoxy. I coated it with epoxy, faired it in and painted it.
Here is what it looks like now;
I felt like the rudder was in pretty good shape. The straps that Herb added seem like a reasonable precaution to prevent the end of the rudder (beyond the seam) from sliding off.
______________________________________________
While in the midst of a haul out, I decided to do something about the lazy-rat drain.
Sometimes when or sailing hard or motoring above 5 knots, if the stern squats the lazy-rat will fill with water and my fuel tank, 2 stroke oil bottle, funnel and whatever else will float around until I slow down. :P
I have noticed that there are times when it would drain, but can not because of the smallish drain (mine is about 3/4?).
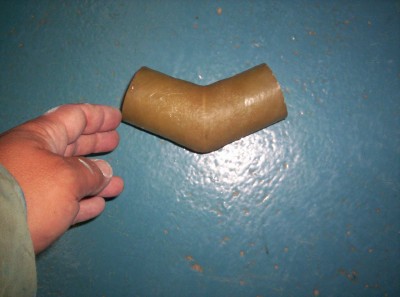
I used a 2? hole saw to cut around the current drain hole, and then used a rasp to taper the edges of the hole. I then sawed a piece of 1 ?? fiberglass pipe at a shallow angle, rotated the ends and epoxy and glassed them back together to make this;
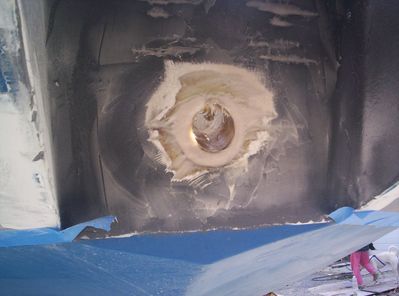
I pulled out all the foam I could reach through the holes and was surprised to find it was damp, but neither was it saturated or did it smell of gas. One of #226?s prior owners had overlain the lazyrat floor with glass years ago, and while the poured resin had not held, the glass apparently had done a pretty good job of protecting the floor. (I removed the resin that had been poured in with a heat gun a couple years ago).
I then foamed the new pipe in place, and when the foam hardened I chipped it out for an inch or so on the top and the bottom around the pipe. I laid thickened epoxy into this void, to secure the new pipe.
I will let you know how it works.
_______________________________________
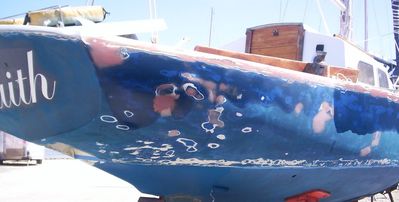
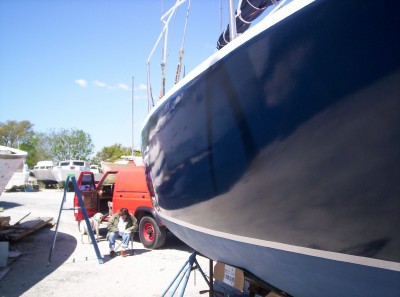
I had not scrubbed the hull since the fall. I normally dive on her for a good scrub before a race. The boot stripe paint has been failing since I got her, I do not think it was the correct type, and it has spent a good deal of it?s life below water due to the boat being loaded with too much gear. I have tried to remove stuff, and for everything I take off I find I need to add two more. I will raise the waterline by about 1 ??.
Sanding down the high spots, and filling the lows begins;
There are many, many pictures of this activity, I will spare you. Basically the process was to sand every inch with 80 grit, then with 100 grit I took down all the bad stuff I could see. The obvious bad spots were filled, and smoothed.
Interlux ?precoat? high build primer was then rolled over the whole thing and all the stuff that looked pretty good suddenly no longer did. Several rounds of wet sanding and filling took place over the next few days.
I thinned the topcoat (interlux brightsides) as thin as I dared, and rolled it on?.. as you guys said it would it looked horrible!
It was so thin that you could see all the variations in the primer through it! Wet sanding only made matters worse, but the second coat seemed to help a little. I had thinned it so much that we did 2 coats with the first quart and still had paint to spare. We ended up doing 4 coats, 3 might have been fine but for the roller fiasco I mentioned earlier.
I went on applying thin coats, and wet sanding with 400 in between to remove the orange peel, and ?no-see?em?s?.
Guys, here is a tip for you. Make sure you have a big stick with you because when the rest of the guys in the yard see your first mate wetsanding they will try to steel her from you. ;D ;D ;D
We have been on the hard for over 2 weeks now, and Rose has been the only spouse I have seen working in the yard. When asked about this, she answers matter of factly ?it?s my boat too?. ;)
The port side after the tape comes off of the boot stripe;
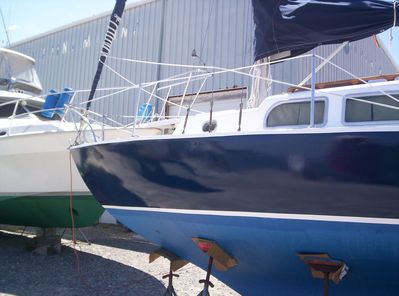
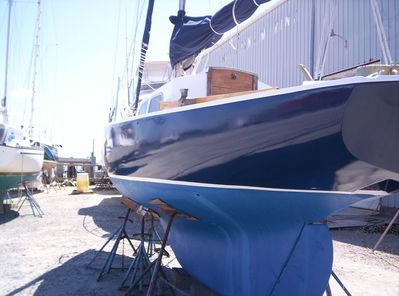
The starboard bow;
I am still working on re-installing the s/s rubstrake. The hull to deck joint was dremmeled out, and the seam and screw holes were filled with thickened epoxy. I am bedding the rails in polyurethane (PL window and door, I love that stuff). It is messy work but should look nice and leak free (I hope) when I am done.[/quote]
Here are a couple more shots;
This is the original stainless steel rub strake. I removed it and ground out the filler that sealed up the deck to hull joint (back in 1964, it had long since ceased from sealing anything). It was a tough call to put this back on, since it involved drilling over 100 holes in the toe rail I had just finished sealing up. For anyone who has not messed with this, I suggest you tag the pieces with were they came from? even though I filled all the holes, so I did n ot need them to match I found it really only goes back on right one way.
It is bedded in 2 and a half tubes of PL polyurethane (quiet the messy job!).
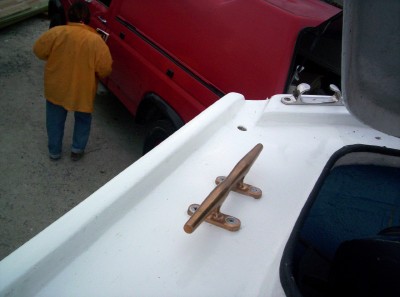
Then, here are the new stern cleats There are 6 of these 10" hershoff bronze cleats;
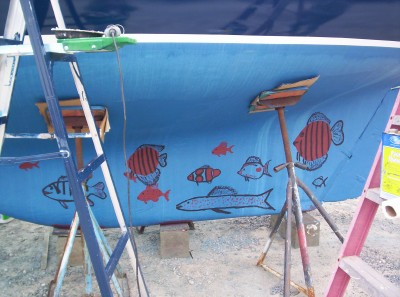
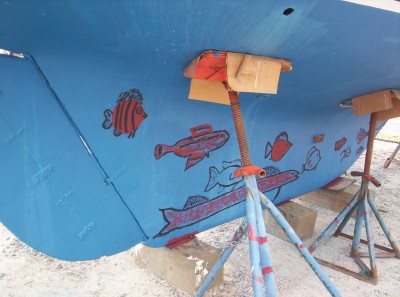
And finally. Saving the best for last.... ;D
Rose wanted to make sure the fish that visited us would have some company... and that when we were diving in the crystal clear water we will be in we will know our boat from below... so she used some extra cans of bottom paint laying around the yard to bring these friends along... ;D
Port side;
Starboard;
:)
