The Plastic Classic Forum, your free and in-depth resource for information on re/building classic sailboats. ... Be sure to visit / join our sister site at sailFar.net! ... And don't forget to check out Atom's Virtual Home Port! ...
The storage area/office is a great place to cure epoxy. It's not attached to the main house and it stays very warm all day and night. I think these foils are almost done. I might add another coat of pigmented epoxy, but I'm starting to use epoxy like it's paint. So,,,,, it's time to go shopping for some paint.
A 75 watt bulb adds extra heat to this large cabinet.
It's tough to get good pictures of bright, white, glossy objects. These foils are done for now. I'm looking forward to sail testing them.
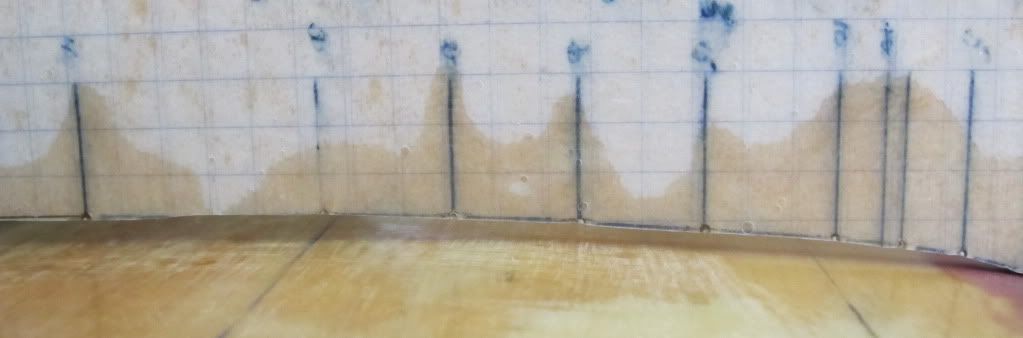
There's no way these foils are perfect, but their sooooo much better than the factory originals. If I decide to start rebuilding them (one more time,) I'll start with more precise templates. This one is graph paper epoxied onto 1/4" plywood.
Last edited by TampaBay on Wed Jan 28, 2015 12:08 pm, edited 1 time in total.
Thanks CapnK. I have to wonder how this boat will sail will nice foils. I still have to fit some "shoes" into the top and bottom of the centerboard trunk, in order to hold the leading edge and trailing edge securely in place.
Here is a look at the original shape of the board, when compared to the template (before template fairing.) There is at least a 1/4 inch gap, and in some places, more. One side was completely flat (concave in spots,) and the other side was only slightly better. Same deal with the rudder.
The boat: Waiting in the wings, as a truck project takes center stage. The air flow meter was tested with a multimeter. It has 12v in and a good ground. If the computer determines that the output voltages are not within range, it ignores the air flow meter and will control the engine with information from the throttle position sensor (not good.)
Last edited by TampaBay on Sun Jan 18, 2015 8:18 pm, edited 1 time in total.
Fitting the new centerboard: From the cockpit, the board won't fit into the trunk. The maximum width of the board is 1 and 1/8th", the top lip of the slot is about 1 and 1/16th". I'll feed it through the bottom for now. I'm waiting for a small epoxy patch at the forward end of the slot, to cure (just under the top work lamp.) There was a small crack.
Somehow, the foil project turned into a bottom job. I chose Rust-Oleum Topside.
The hull was fared with epoxy a couple years ago. It was faster, but there was room for improvement. I sanded the epoxy down to bare hull with 60 grit, then applied the Rust-Oleum primer. The primer went on to thick (live and learn,) 90 percent was sanded off with 120 grit paper.
The first coat of gray went down with a 4" foam roller. The paint was thinned to 7% mineral spirits. It lays down very flat; no "roll and tip," just "roll and roll."
After about 5 hours, the first coat was hard enough to sand with 320 grit (and it sands nicely.) Then the second coat was applied.
Later today, I'll sand again with 320 grit and add the third coat. The foam roller does not add a thick layer of paint, so a fourth coat might be needed. After the final application, I'll start wet sanding with 400 grit paper.
Last edited by TampaBay on Tue Feb 10, 2015 10:20 am, edited 5 times in total.
Thanks pjesus. This time of year is nice because we get a short break from the humidity.
Anyone have experience with this tape? I'm considering it to shim the centerboard in the slot but I don't know if the adhesive is waterproof. It's "Jap tape."
To center the board in the slot, I hung a plumb-bob from the trailing edge (mid span.)
With shims, the board was centered in the slot.
After the board was in position, plastic bags were place into the gaps and then filled with liquid epoxy. When the epoxy sets, it will form permanent shims or "shoes."
There are two shoes at the leading edge, and one shoe at the trailing edge (it wraps around to make a U shape.) I plan to sand away the excess and then reattach with more epoxy.
Last edited by TampaBay on Mon Apr 20, 2015 3:20 pm, edited 1 time in total.
The rough edges of the epoxy shoes were sanded away. They were then fixed into position. One pair at the leading edge and one pair at the trailing edge.
With the left over epoxy I did some repairs on this chair.
Thanks pjesus. The boat is off the horses and back on the trailer. It's a big milestone because now, I can park my car in the garage. The area of the centerboard trunk that takes the lateral forces of the board was reinforced with epoxy and 3/8ths inch Okume plywood. I also added 4 layers of 10 ounce fiberglass along the center of the hull.
Last edited by TampaBay on Sun Apr 05, 2015 12:40 pm, edited 3 times in total.
Laminated and installed a new compression post. This was a Father and Son project.
Six layers of 3/8ths inch Okume. Added stringers and new fiberglass. The dimensions of that forward bulkhead are being reduced (I'm cutting large sections out.) It was overbuilt.
Last edited by TampaBay on Mon Apr 20, 2015 3:23 pm, edited 2 times in total.
polyurathaneAccording to the manager of a local West Marine store, that sealant you used is basically the same as 3M5200
(a very tenacious Polyurethane Adhesive/Sealant)
According to the manager of a local West Marine store, that sealant you used is
basically the same as 3M5200 (a very tenacious Polyurethane Adhesive/Sealant)
This is West Marine Model 14010425. Here is a description of the product copied from the West Marine web site.
"A good choice for bedding, bonding and sealing deck hardware and thru-hull fittings above and below the waterline where the need for future removal may arise."
All the hardware is reinstalled. All the control lines are back in place. There have been some serious changes over the winter. Rebuilt foils, changes to the hull's super structure and a new bottom. I am very excited to get out for a test sail.
The weather in Sarasota right now is warm and overcast. The wind is light and there's a big boat show in town (the boat launch is packed.)
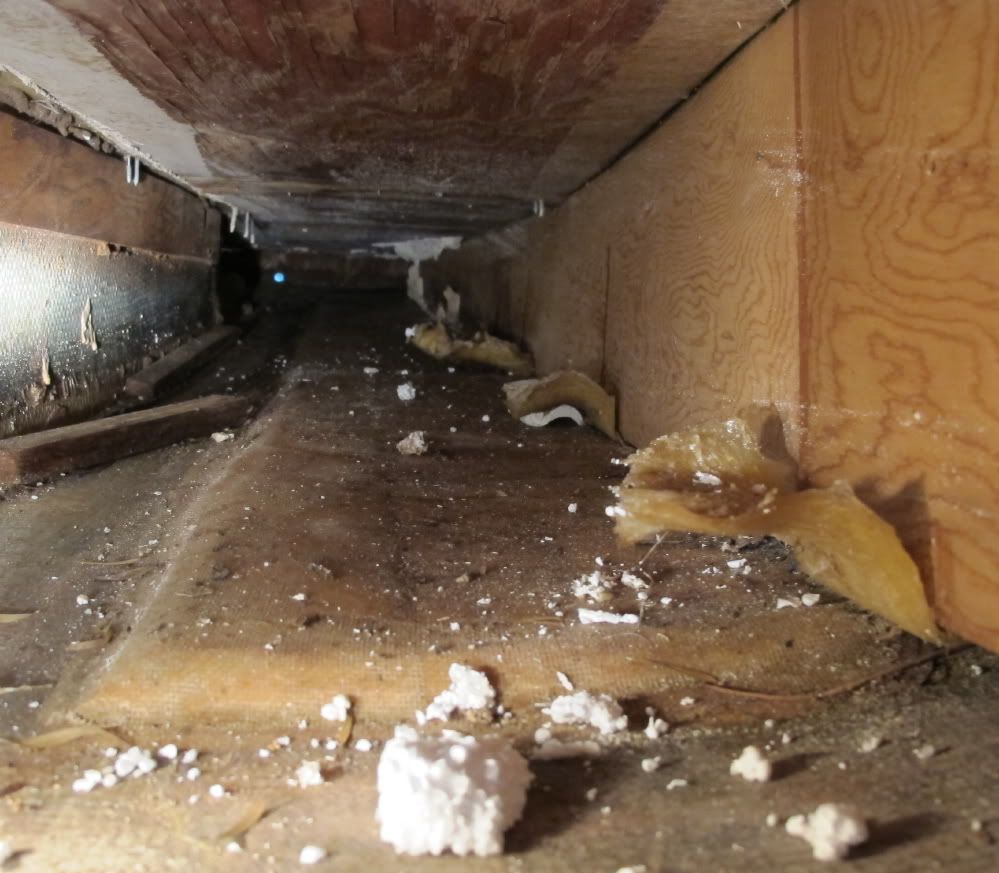
I thought that a couple "before and after" pictures would be fun. This is bellow the cockpit, port side looking aft from just alongside the mast compression post.
At left is the centerboard trunk. That loose lumber was a backing strip for the centerboard gasket screws. I found 3 pieces rolling around completely unattached, 2 pieces popped free after a light knock, and the aft two are still in place (one port and one starboard.)
Along the bottom is a glassed over foam stringer. It was terribly resin starved. I added lots of new resin and glass here.
Along the right is a stringer that runs from the mast step to the transom. It's attached only at the outboard side of the top joint (best as I can tell.) It didn't look to be attached along the bottom joint. I epoxied this stringer into the hull with a wet out, fillets, and glass. Those crazy fiberglass "ears" were cut off flush with the stringer. My guess is they were used to hold the flotation up and off the bottom (a long block of Styrofoam)
At top is the cockpit sole. The screw holes were over drilled (the ends of the screws are visible,) filled with epoxy and re-drilled. Backing plates were added to the aft most cluster of screws (they are the 8 screws attaching the barney post.) I also added glass and epoxy to the flat surface.
I glassed in these stringers. Each one is WRC and about 5 feet long. The original keel strip was removed because it was waterlogged and moldy. It was replaced with 4 layers of 10 ounce cloth (7 layers under the new mast step.) The extra tabbing over the stringers is to distribute the compression of the new frames and corner stiffeners.
This is the same space, after reconstruction. I framed everything with epoxy saturated Okume.
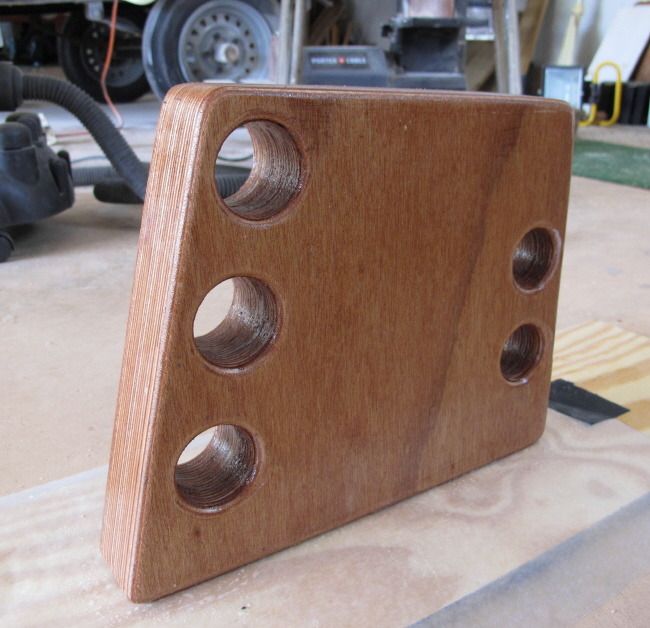
The new compression post assembled.
Installation started.
Installation completed. Does this look sturdy enough?
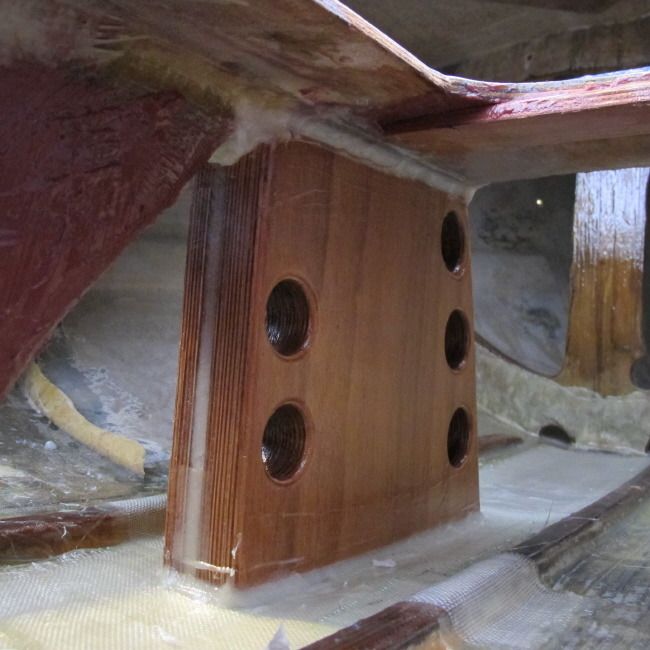
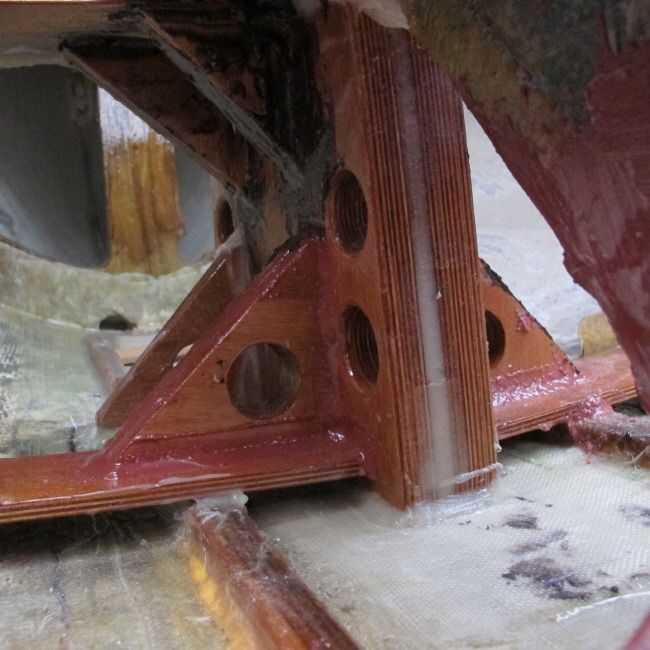
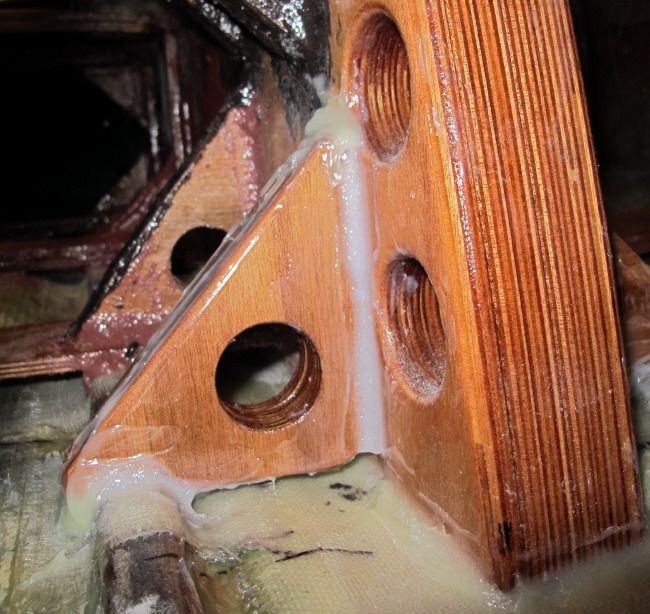
Here is that compression post from the front.The front triangles are notched into the stringers.The epoxy is Six10, it looks messy because it is. This is a very tight space and so perfect looking fillets are just not happening.
Replacing a signal lamp on the trailer (again.) This time I sanded and repainted the bracket and bought new stainless hardware. This stuff was a mess to disassemble so now, it's anti-seize everywhere.
Installed.
I disassembled the barney post and sanded off the old paint. It was painted a couple years ago but, it's time for an upgrade. The bolts were soaked in wd40 overnight.