Removing Deck Hardware / What To Do With the Holes?
Posted: Wed Jun 11, 2008 2:30 pm
Hi All,
I wanted to share a method I have used as a temporary and sometimes permanant solution for the holes when deck hardware has been moved or removed.
Our boat has been upgraded to self tailing winches and we had not used the fixed cleats on the cockpit coaming since we bought the boat. The kids were banging heads on them so I figured it was time for them to go..
Here's what I did..
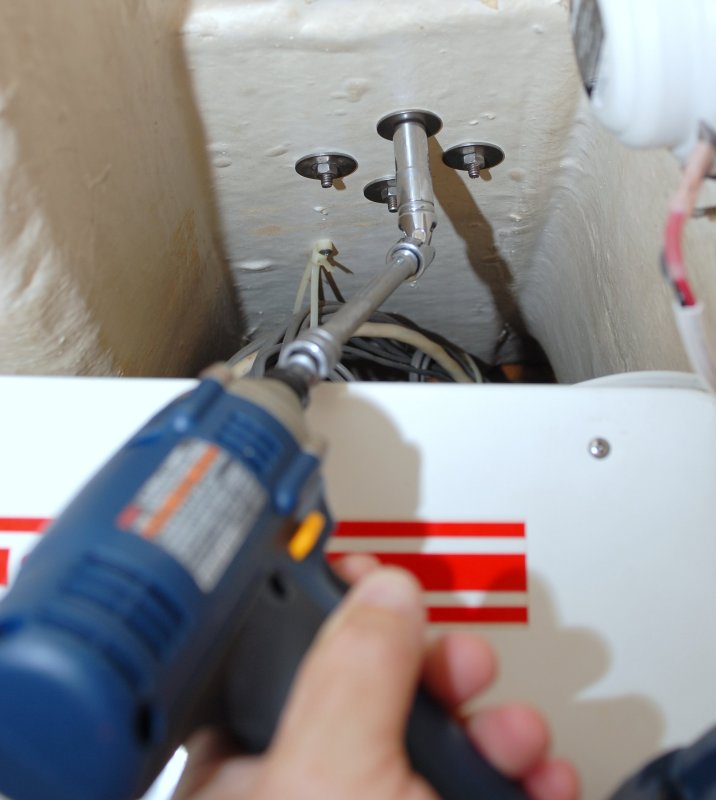
To make this an easy one person job I simply use my cordless impact wrench. This allows the nuts to be removed from one side only using no wrench or screw driver on deck.
Less Than 30 seconds later and notice the absolute lack of rust or moisture. These cleats were still bone dry after 29 years!!!! Why? Butyl tape as a bedding compound!!
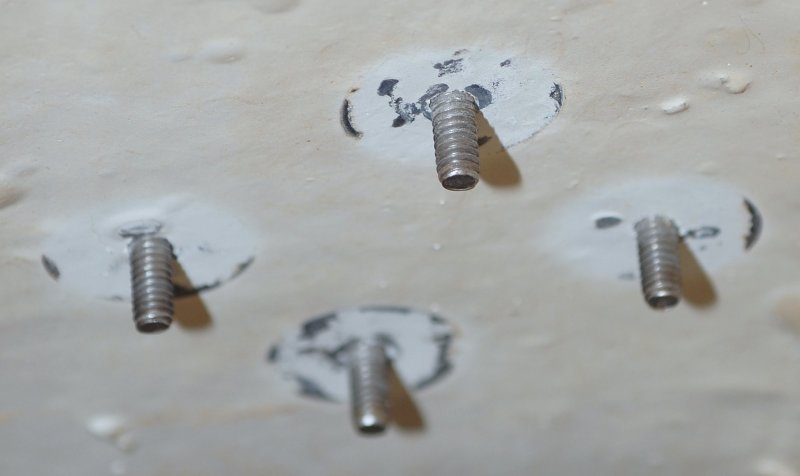
Yep still totally flexible and water proof after nearly 30 years! Oh and SUPER EASY TO REMOVE!! These cleats used to see decent loads, before the ST's so it's PROOF you don't need to GLUE mechanically fastened hardware onto your boat!!

For the butyl doubters and pro 5200 crowd I present 29 year old BONE DRY CORE!!
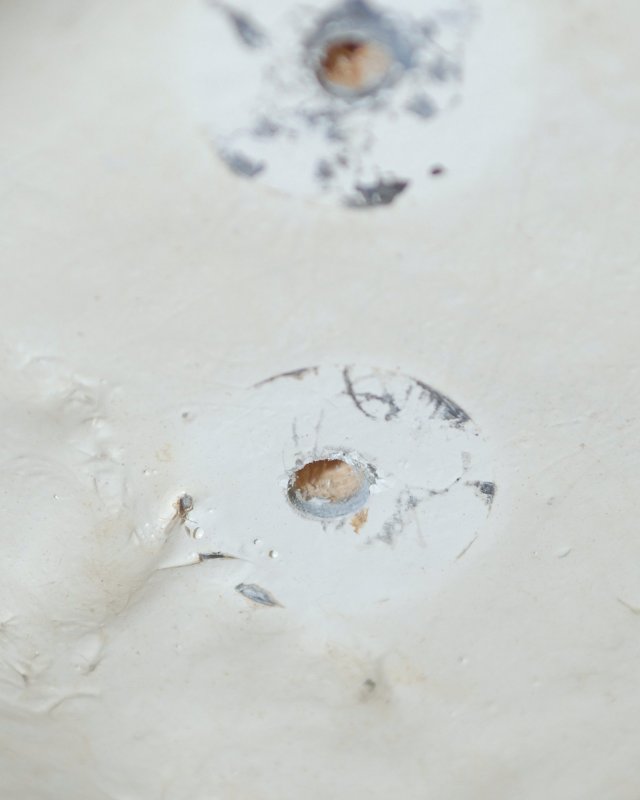
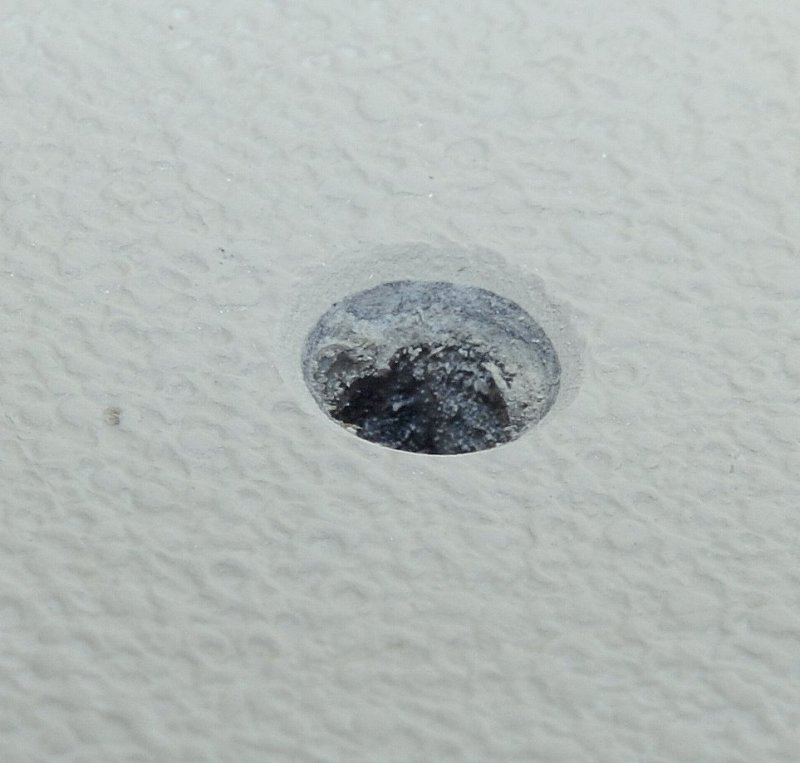
Spider crazing/cracking is caused by not feathering or beveling the edges of the hole drilled through gelcoat.
I countersunk each hole:
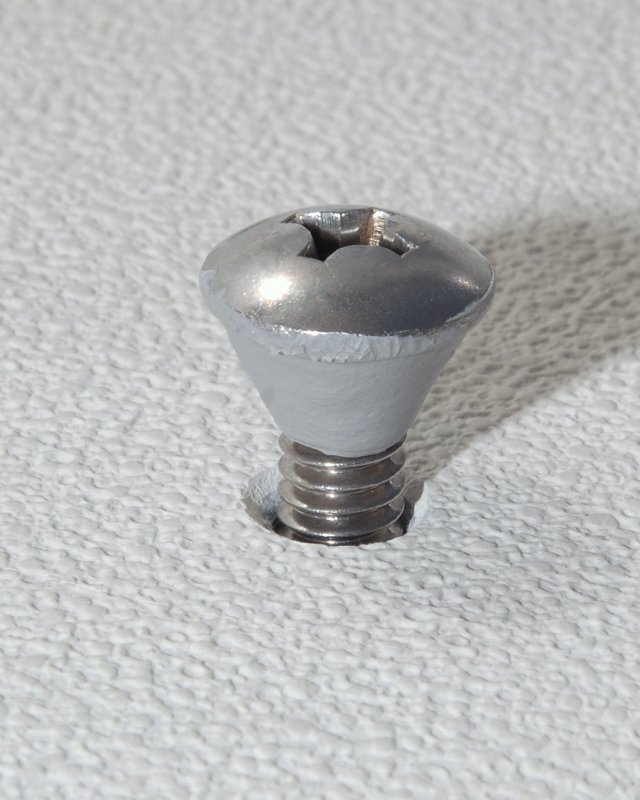
Choose a fastener to fill the hole? I prefer what are called Truss Head fasteners as there are less points for potential leakage and the head sits nice and low to the deck. The Truss Head is all the way to the left:

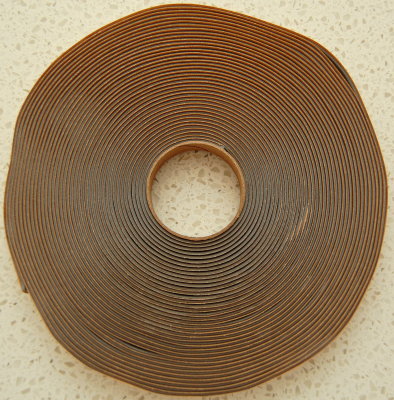
I used gray 1/2" wide by 1/16" thick butyl tape to install the fasteners used to hide the holes:
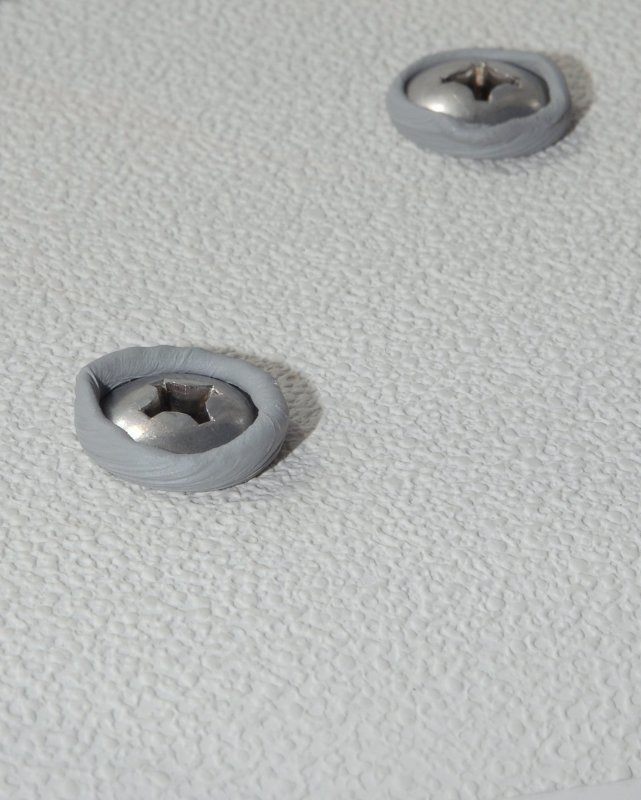
I wraped & mold the butyl into a cone so it fits down into the countersunk hole and gives a 100% seal:
Tighten everything down with the impact driver:
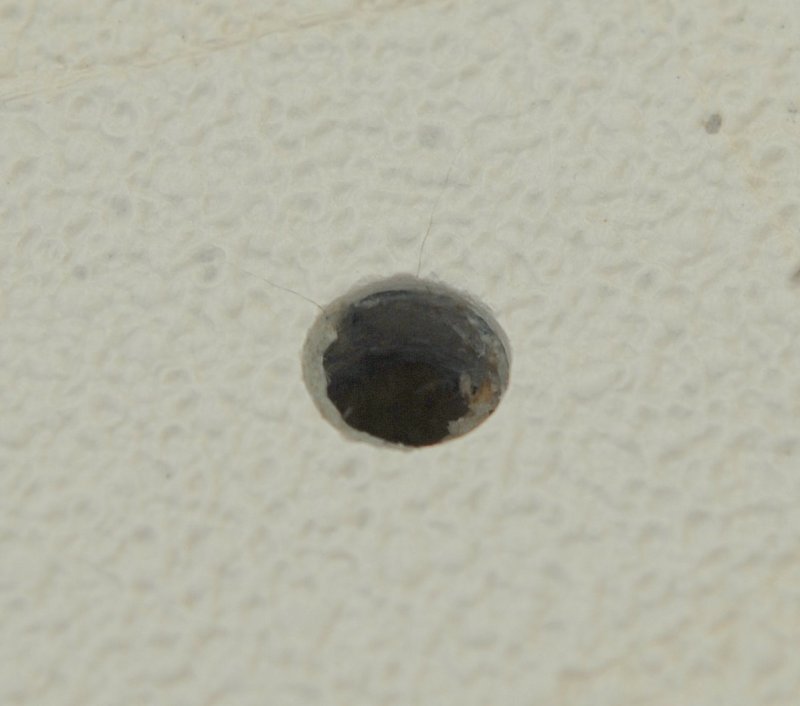
Where the cleat used to be and can be again. This is a lot easier than trying to match a gelcoat color and then create a non skid pattern that matches:

This project, removing two cleats and filling the holes with Truss Head machine screws, took me about a half hours total time including cleaning up the non skid with a Magic Eraser, paint thinner and some Acetone.
Just another option for a question I see here often..
I wanted to share a method I have used as a temporary and sometimes permanant solution for the holes when deck hardware has been moved or removed.
Our boat has been upgraded to self tailing winches and we had not used the fixed cleats on the cockpit coaming since we bought the boat. The kids were banging heads on them so I figured it was time for them to go..
Here's what I did..
To make this an easy one person job I simply use my cordless impact wrench. This allows the nuts to be removed from one side only using no wrench or screw driver on deck.
Less Than 30 seconds later and notice the absolute lack of rust or moisture. These cleats were still bone dry after 29 years!!!! Why? Butyl tape as a bedding compound!!
Yep still totally flexible and water proof after nearly 30 years! Oh and SUPER EASY TO REMOVE!! These cleats used to see decent loads, before the ST's so it's PROOF you don't need to GLUE mechanically fastened hardware onto your boat!!
For the butyl doubters and pro 5200 crowd I present 29 year old BONE DRY CORE!!
Spider crazing/cracking is caused by not feathering or beveling the edges of the hole drilled through gelcoat.
I countersunk each hole:
Choose a fastener to fill the hole? I prefer what are called Truss Head fasteners as there are less points for potential leakage and the head sits nice and low to the deck. The Truss Head is all the way to the left:
I used gray 1/2" wide by 1/16" thick butyl tape to install the fasteners used to hide the holes:
I wraped & mold the butyl into a cone so it fits down into the countersunk hole and gives a 100% seal:
Tighten everything down with the impact driver:
Where the cleat used to be and can be again. This is a lot easier than trying to match a gelcoat color and then create a non skid pattern that matches:
This project, removing two cleats and filling the holes with Truss Head machine screws, took me about a half hours total time including cleaning up the non skid with a Magic Eraser, paint thinner and some Acetone.
Just another option for a question I see here often..